Firebase provides a complete backend infrastructure for web and mobile applications without the complexity of managing servers. Authentication, databases, storage, hosting, and push notifications—all available through a unified platform with generous free tiers. This Firebase setup guide walks you through configuring a production-ready Firebase project from scratch.
Whether you’re building a Flutter app, React web application, or native mobile app, the Firebase setup process follows similar patterns. By the end of this guide, you’ll have a properly configured Firebase project with authentication, database, and hosting ready for development.
Creating Your Firebase Account and Project
Firebase uses your Google account for authentication. If you have a Gmail address, you already have access to Firebase.
Initial Account Setup
Navigate to firebase.google.com and click “Get Started.” Sign in with your Google account. If you’re using a Google Workspace account for your organization, ensure you have permission to create Firebase projects—some organizations restrict this.
After signing in, you’ll land on the Firebase Console. This dashboard becomes your central hub for managing all Firebase services across your projects.
Creating a New Firebase Project
Click “Add Project” to start the Firebase setup wizard. The process involves three steps:
Step 1: Project naming. Choose a descriptive name that identifies your application. Firebase generates a unique project ID based on this name—you can customize the ID, but you cannot change it later. For production apps, use a naming convention like myapp-prod or companyname-appname.
Step 2: Google Analytics. Firebase offers to enable Google Analytics for your project. For production applications, enable this. Analytics provides user behavior insights, crash reporting integration, and A/B testing capabilities. You can disable it for development or prototype projects to simplify setup.
Step 3: Analytics configuration. If you enabled Analytics, select or create a Google Analytics account. For most projects, creating a new account dedicated to this application works best.
Project creation takes 30-60 seconds. Once complete, Firebase redirects you to the project dashboard.
Adding Applications to Your Firebase Project
A single Firebase project can support multiple applications—iOS, Android, and web apps all connecting to the same backend services. This is useful for cross-platform applications sharing a unified database and authentication system.
Setting Up a Web Application
From the project dashboard, click the web icon (</>) to add a web app. Provide an app nickname (for your reference in the console) and optionally enable Firebase Hosting during this step.
Firebase generates a configuration object containing your project credentials:
const firebaseConfig = {
  apiKey: "AIzaSyD...",
  authDomain: "your-project.firebaseapp.com",
  projectId: "your-project",
  storageBucket: "your-project.appspot.com",
  messagingSenderId: "123456789",
  appId: "1:123456789:web:abc123"
};
Store this configuration securely. While these values are technically visible in client-side code, you should still treat them as configuration data rather than hardcoded strings. Use environment variables in your build process:
// Using environment variables (recommended)
const firebaseConfig = {
  apiKey: process.env.REACT_APP_FIREBASE_API_KEY,
  authDomain: process.env.REACT_APP_FIREBASE_AUTH_DOMAIN,
  projectId: process.env.REACT_APP_FIREBASE_PROJECT_ID,
  storageBucket: process.env.REACT_APP_FIREBASE_STORAGE_BUCKET,
  messagingSenderId: process.env.REACT_APP_FIREBASE_MESSAGING_ID,
  appId: process.env.REACT_APP_FIREBASE_APP_ID
};
Setting Up Mobile Applications
For iOS and Android apps, the Firebase setup requires platform-specific configuration files.
Android setup: Click the Android icon, enter your package name (e.g., com.yourcompany.appname), and optionally add your SHA-1 certificate fingerprint for certain features like Google Sign-In. Download the google-services.json file and place it in your app’s android/app/ directory.
iOS setup: Click the iOS icon, enter your bundle ID (e.g., com.yourcompany.appname), and optionally add your App Store ID. Download the GoogleService-Info.plist file and add it to your Xcode project.
For Flutter applications, the FlutterFire CLI simplifies this process significantly. Install it and run the configuration command:
# Install FlutterFire CLI
dart pub global activate flutterfire_cli

# Configure your Flutter app
flutterfire configure
This generates the necessary configuration files for all platforms and creates a firebase_options.dart file for initialization.
Configuring Firebase Authentication
Firebase Authentication handles user identity across your applications. It supports multiple providers and integrates seamlessly with other Firebase services.
Enabling Sign-In Providers
Navigate to Authentication in the Firebase Console sidebar, then click the “Sign-in method” tab. Enable the providers you want to support:
Email/Password: The simplest option. Users create accounts with email addresses and passwords. Enable “Email link (passwordless sign-in)” for magic link authentication—a better user experience that eliminates password management.
Google Sign-In: Requires minimal configuration for web apps since Firebase handles OAuth. For mobile apps, ensure you’ve added the correct SHA-1 fingerprint (Android) or configured URL schemes (iOS).
Social providers: Facebook, Twitter, GitHub, and Apple sign-in require creating developer accounts with those platforms and configuring OAuth credentials. Each provider has specific setup requirements documented in the Firebase Console.
Implementing Authentication in Code
After enabling providers, implement authentication in your application:
import { getAuth, signInWithEmailAndPassword, createUserWithEmailAndPassword } from 'firebase/auth';

const auth = getAuth();

// Create new user
async function signUp(email, password) {
  try {
    const userCredential = await createUserWithEmailAndPassword(auth, email, password);
    console.log('User created:', userCredential.user.uid);
    return userCredential.user;
  } catch (error) {
    console.error('Sign up error:', error.code, error.message);
    throw error;
  }
}

// Sign in existing user
async function signIn(email, password) {
  try {
    const userCredential = await signInWithEmailAndPassword(auth, email, password);
    return userCredential.user;
  } catch (error) {
    if (error.code === 'auth/user-not-found') {
      // Handle user not found
    } else if (error.code === 'auth/wrong-password') {
      // Handle wrong password
    }
    throw error;
  }
}

// Listen for auth state changes
import { onAuthStateChanged } from 'firebase/auth';

onAuthStateChanged(auth, (user) => {
  if (user) {
    // User is signed in
    console.log('Signed in as:', user.email);
  } else {
    // User is signed out
    console.log('No user signed in');
  }
});
Setting Up Your Database: Firestore vs Realtime Database
Firebase offers two database options. Understanding their differences helps you choose correctly.
Cloud Firestore
Firestore is Firebase’s newer, more scalable database. It organizes data into collections and documents with a hierarchical structure. Use Firestore for most applications—it handles complex queries, scales automatically, and provides better offline support.
Enable Firestore from the Firebase Console. Choose “Start in production mode” for real applications (you’ll configure security rules next) or “Start in test mode” for rapid prototyping (allows all reads/writes for 30 days).
Select your database location carefully. Choose a region close to your primary user base. Multi-region options provide higher availability but cost more. You cannot change the location after creation.
import { getFirestore, collection, addDoc, getDocs, query, where } from 'firebase/firestore';

const db = getFirestore();

// Add a document
async function addUser(userData) {
  const docRef = await addDoc(collection(db, 'users'), {
    name: userData.name,
    email: userData.email,
    createdAt: new Date()
  });
  return docRef.id;
}

// Query documents
async function getActiveUsers() {
  const q = query(
    collection(db, 'users'),
    where('status', '==', 'active')
  );

  const snapshot = await getDocs(q);
  return snapshot.docs.map(doc => ({
    id: doc.id,
    ...doc.data()
  }));
}
Realtime Database
The Realtime Database is Firebase’s original database. It stores data as one large JSON tree and excels at real-time synchronization with minimal latency. Use it for applications requiring instant updates—chat applications, live dashboards, or collaborative features where milliseconds matter.
import { getDatabase, ref, set, onValue } from 'firebase/database';

const db = getDatabase();

// Write data
function writeUserStatus(userId, status) {
  set(ref(db, 'users/' + userId + '/status'), status);
}

// Listen for real-time updates
function listenToUserStatus(userId, callback) {
  const statusRef = ref(db, 'users/' + userId + '/status');
  onValue(statusRef, (snapshot) => {
    callback(snapshot.val());
  });
}
Configuring Security Rules
Security rules protect your database from unauthorized access. Never leave test mode rules in production.
// Firestore security rules
rules_version = '2';
service cloud.firestore {
  match /databases/{database}/documents {
    // Users can only read/write their own documents
    match /users/{userId} {
      allow read, write: if request.auth != null && request.auth.uid == userId;
    }

    // Public read, authenticated write
    match /posts/{postId} {
      allow read: if true;
      allow write: if request.auth != null;
    }
  }
}
Setting Up Firebase Hosting
Firebase Hosting provides fast, secure hosting for web applications with automatic SSL certificates and global CDN distribution.
Installing Firebase CLI
Install the Firebase CLI globally:
npm install -g firebase-toolsAuthenticate with your Google account:
firebase loginInitializing Your Project
Navigate to your project directory and initialize Firebase:
firebase initSelect “Hosting” when prompted. Choose your existing Firebase project. Configure your public directory—typically build for React apps, dist for Vue/Angular, or public for static sites.
For single-page applications, answer “Yes” when asked about configuring as a single-page app. This creates proper rewrites for client-side routing.
Deploying Your Application
Build your application, then deploy:
# Build your app (example for React)
npm run build

# Deploy to Firebase
firebase deploy
Firebase provides a URL like your-project.web.app. Configure custom domains in the Firebase Console under Hosting.
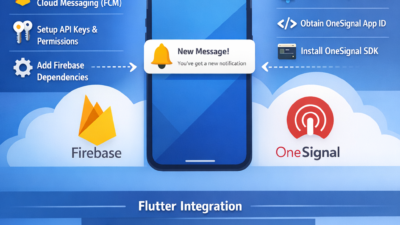
Setting Up Push Notifications with Cloud Messaging
Firebase Cloud Messaging (FCM) delivers push notifications to web and mobile applications.
Web Push Notification Setup
Generate a VAPID key in the Firebase Console under Project Settings > Cloud Messaging. Add the messaging service worker to your project:
// firebase-messaging-sw.js (in public folder)
importScripts('https://www.gstatic.com/firebasejs/9.0.0/firebase-app-compat.js');
importScripts('https://www.gstatic.com/firebasejs/9.0.0/firebase-messaging-compat.js');

firebase.initializeApp({
  apiKey: "...",
  projectId: "...",
  messagingSenderId: "...",
  appId: "..."
});

const messaging = firebase.messaging();

messaging.onBackgroundMessage((payload) => {
  const notificationTitle = payload.notification.title;
  const notificationOptions = {
    body: payload.notification.body,
    icon: '/icon.png'
  };

  self.registration.showNotification(notificationTitle, notificationOptions);
});
Request notification permission and get the device token:
import { getMessaging, getToken, onMessage } from 'firebase/messaging';

const messaging = getMessaging();

async function requestNotificationPermission() {
  const permission = await Notification.requestPermission();

  if (permission === 'granted') {
    const token = await getToken(messaging, {
      vapidKey: 'YOUR_VAPID_KEY'
    });

    // Send this token to your server to store for later use
    console.log('FCM Token:', token);
    return token;
  }
}

// Handle foreground messages
onMessage(messaging, (payload) => {
  console.log('Received foreground message:', payload);
  // Display notification or update UI
});
Common Firebase Setup Pitfalls
Avoid these frequent mistakes during Firebase setup:
Leaving test mode security rules in production. Test mode rules expire after 30 days, but even before expiration, they expose your entire database to anyone. Always configure proper security rules before launching.
Not enabling App Check. App Check verifies that requests come from your legitimate applications, preventing abuse of your Firebase resources. Enable it for production applications.
Ignoring billing alerts. Firebase’s free tier is generous, but unexpected traffic can generate costs. Set up budget alerts in the Google Cloud Console to avoid surprises.
Hardcoding configuration in version control. While Firebase configuration isn’t secret, environment-specific settings belong in environment variables, not committed code.
Next Steps After Firebase Setup
With your Firebase project configured, you’re ready to build. Consider exploring these additional Firebase services:
- Cloud Functions: Run backend code in response to events without managing servers
- Cloud Storage: Store and serve user-generated content like images and files
- Remote Config: Change app behavior without deploying updates
- Performance Monitoring: Track app performance and identify bottlenecks
For Flutter-specific Firebase integration, see our guide on integrating Firestore in Flutter. If you’re implementing user authentication flows, check out our Flutter login/register flow guide.
Firebase provides a solid foundation for building production applications. Start with the services you need, and expand as your application grows. The unified platform makes adding new capabilities straightforward as your requirements evolve.


2 Comments