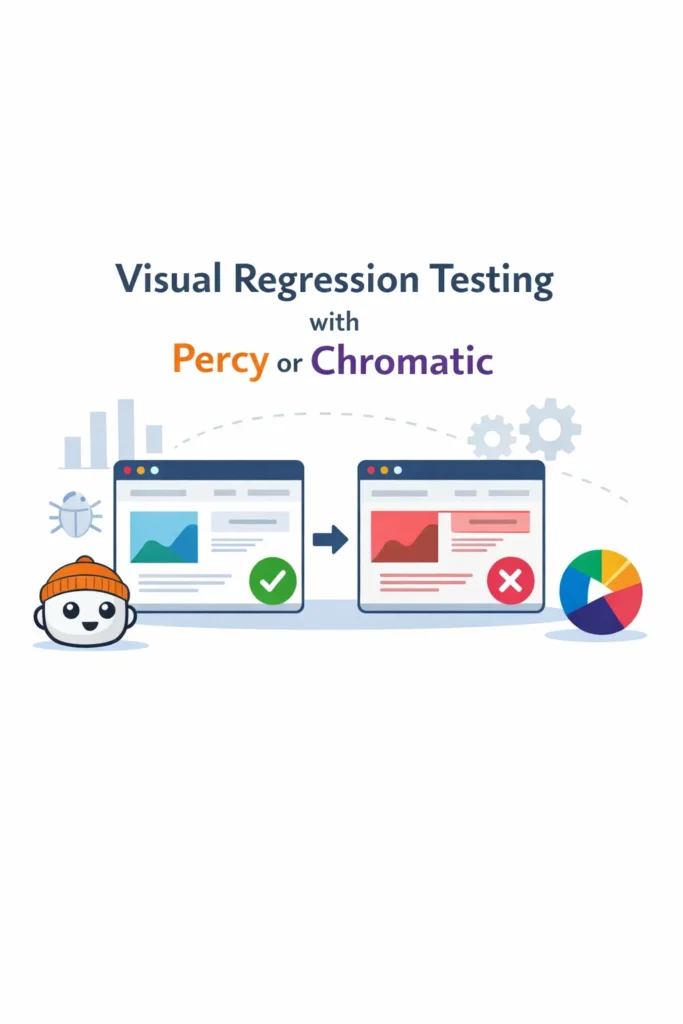
If your team has ever shipped a CSS change that looked fine on the page you edited but broke the layout on three other pages, you know that unit tests and integration tests don’t catch visual bugs. Visual regression testing solves this by automatically capturing screenshots of your UI components and comparing them against approved baselines. When something changes — intentionally or not — you see the exact visual diff before it reaches production. This guide walks through setting up visual regression testing with both Chromatic and Percy, integrating with Storybook, connecting to your CI pipeline, and choosing between the two tools.
What Is Visual Regression Testing?
Visual regression testing is an automated process that compares screenshots of your UI against previously approved baseline images. When a code change alters the visual output of a component or page, the tool highlights the pixel-level differences and flags them for review. The developer then approves intentional changes or fixes unintentional regressions before merging.
Unlike unit tests that verify logic or integration tests that check data flow, visual regression tests verify what the user actually sees. A CSS specificity conflict, a z-index stacking issue, or a font-loading race condition can all produce bugs that are invisible to traditional tests but immediately obvious in a screenshot comparison. As a result, visual regression testing fills a gap that other testing approaches cannot cover.
How Visual Regression Testing Works
The workflow follows a consistent pattern regardless of which tool you use:
- Capture: The tool renders each component or page and takes a screenshot
- Compare: Each screenshot is compared pixel-by-pixel against a stored baseline
- Diff: Any differences are highlighted in a visual diff overlay
- Review: A developer reviews the diffs and approves or rejects each change
- Update: Approved screenshots become the new baselines for future comparisons
Both Percy and Chromatic integrate with Storybook, which makes them particularly effective for component libraries. Each Storybook story becomes a visual test case automatically — you don’t write separate visual test files. However, both tools also support page-level testing through Playwright or Cypress integration for full-page screenshots.
Percy vs Chromatic: Key Differences
Both tools serve the same fundamental purpose, but they differ in pricing, workflow integration, and additional features.
| Feature | Percy (BrowserStack) | Chromatic (Storybook team) |
|---|---|---|
| Built by | BrowserStack | Storybook maintainers |
| Storybook integration | Plugin-based | Native (first-party) |
| Cross-browser screenshots | Yes (Chrome, Firefox, Safari) | Chromium only |
| Responsive testing | Built-in viewport configs | Via Storybook viewport addon |
| CI integration | GitHub, GitLab, Bitbucket, CircleCI | GitHub, GitLab, Bitbucket, CircleCI |
| Free tier | 5,000 screenshots/month | 5,000 snapshots/month |
| UI review workflow | Web dashboard with approvals | Web dashboard with approvals |
| Storybook hosting | No | Yes (publishes your Storybook) |
| Interaction testing | Via Cypress/Playwright | Via Storybook play functions |
| Pricing model | Per screenshot | Per snapshot |
The biggest practical difference: Chromatic is built by the Storybook team, so its Storybook integration is seamless and it doubles as a Storybook hosting platform. Percy offers cross-browser screenshots (Chrome, Firefox, Safari), which matters if your users are on multiple browsers. Choose based on whether cross-browser coverage or Storybook integration is more important for your project.
Setting Up Chromatic with Storybook
Chromatic is the fastest path to visual regression testing if you already use Storybook. It requires no configuration beyond installing the package and connecting to your repository.
Prerequisites
You need an existing Storybook setup. If you don’t have one yet, initialize it first:
# Initialize Storybook in an existing React project
npx storybook@latest init
Installing and Running Chromatic
# Install Chromatic as a dev dependency
npm install --save-dev chromatic

# Run Chromatic (first run establishes baselines)
npx chromatic --project-token=YOUR_PROJECT_TOKEN

# Expected output:
# Chromatic CLI v11.x.x
# Building Storybook...
# Publishing to Chromatic...
# Found 42 stories across 15 components
# Captured 42 snapshots
# Build passed! View it at https://www.chromatic.com/build?appId=...
The first run captures baselines for every story. Subsequent runs compare new screenshots against those baselines and flag any visual differences.
Writing Stories That Double as Visual Tests
Every Storybook story automatically becomes a Chromatic visual test. Write stories that cover the visual states you care about:
// src/components/Button/Button.stories.tsx
import type { Meta, StoryObj } from '@storybook/react';
import { Button } from './Button';

const meta: Meta<typeof Button> = {
  title: 'Components/Button',
  component: Button,
};

export default meta;
type Story = StoryObj<typeof Button>;

export const Primary: Story = {
  args: {
    variant: 'primary',
    children: 'Click me',
  },
};

export const Secondary: Story = {
  args: {
    variant: 'secondary',
    children: 'Click me',
  },
};

export const Disabled: Story = {
  args: {
    variant: 'primary',
    children: 'Click me',
    disabled: true,
  },
};

export const Loading: Story = {
  args: {
    variant: 'primary',
    children: 'Submitting...',
    isLoading: true,
  },
};
Each story captures a distinct visual state. Chromatic screenshots all four states and tracks changes independently. If a CSS change affects only the disabled state, only that story’s diff will appear for review. For more on building well-structured components, see our guide on React performance optimization.
Handling Dynamic Content
Components with dynamic content like dates, random avatars, or animated elements produce false positives because the screenshot differs on every run. Chromatic provides several mechanisms to handle this:
// Use Storybook decorators to freeze dynamic content
export const WithTimestamp: Story = {
  args: {
    message: 'Hello',
    timestamp: new Date('2026-01-15T10:00:00Z'),
  },
};

// Ignore specific regions using Chromatic parameters
export const WithAnimation: Story = {
  args: {
    variant: 'primary',
    children: 'Animated Button',
  },
  parameters: {
    chromatic: {
      // Pause CSS animations before capture
      pauseAnimationAtEnd: true,
      // Or set a delay to let animations complete
      delay: 300,
    },
  },
};
By passing deterministic props and using Chromatic’s built-in animation handling, you eliminate false positives without sacrificing test coverage.
Setting Up Percy with Storybook
Percy takes a different approach — it captures screenshots across multiple browsers, which catches browser-specific rendering differences.
Installing Percy for Storybook
# Install Percy Storybook adapter
npm install --save-dev @percy/cli @percy/storybook

# Run Percy against your Storybook
npx percy storybook http://localhost:6006

# Or build and run against a static Storybook
npx storybook build
npx percy storybook ./storybook-static

# Expected output:
# [percy] Percy has started!
# [percy] Snapshot taken: Components/Button/Primary
# [percy] Snapshot taken: Components/Button/Secondary
# [percy] Snapshot taken: Components/Button/Disabled
# [percy] Finalized build #1: https://percy.io/...
Percy reads your existing stories and captures screenshots in each configured browser. The results appear in Percy’s web dashboard where you can review diffs and approve changes.
Configuring Viewports and Browsers
Percy lets you define which viewports and browsers to test:
# .percy.yml
version: 2
storybook:
  args: ["--ci"]
  # Skip specific stories that aren't suitable for visual testing
  exclude:
    - "**/*Playground*"
    - "**/*Docs*"

snapshot:
  widths:
    - 375    # Mobile
    - 1280   # Desktop
  minHeight: 1024
  percyCSS: |
    /* Hide elements that cause flaky diffs */
    .live-timestamp { visibility: hidden; }
The widths array captures each story at multiple viewport widths, catching responsive layout bugs. The percyCSS option injects CSS into the page before screenshots, which is useful for hiding dynamic elements like timestamps or live data indicators.
Percy with Playwright for Page-Level Testing
Beyond Storybook, Percy integrates with Playwright for full-page visual regression testing:
// tests/visual/homepage.spec.ts
import { test } from '@playwright/test';
import percySnapshot from '@percy/playwright';

test('homepage visual test', async ({ page }) => {
  await page.goto('/');
  await page.waitForLoadState('networkidle');

  await percySnapshot(page, 'Homepage');
});

test('dashboard visual test', async ({ page }) => {
  await page.goto('/login');
  await page.getByLabel('Email').fill('user@example.com');
  await page.getByLabel('Password').fill('password');
  await page.getByRole('button', { name: 'Sign In' }).click();

  await page.waitForURL('/dashboard');
  await percySnapshot(page, 'Dashboard - Logged In');
});
This approach captures entire pages after real user interactions, catching layout issues that component-level testing might miss. For comprehensive end-to-end testing patterns that pair well with visual tests, see our guide on unit testing with Jest and Vitest.
Integrating Visual Tests into CI/CD
Visual regression testing delivers the most value when it runs on every pull request. Both Chromatic and Percy integrate with GitHub Actions.
Chromatic in GitHub Actions
# .github/workflows/chromatic.yml
name: Visual Regression Tests

on:
  pull_request:
    branches: [main]

jobs:
  chromatic:
    runs-on: ubuntu-latest
    steps:
      - uses: actions/checkout@v4
        with:
          fetch-depth: 0  # Required for Chromatic's git diffing

      - uses: actions/setup-node@v4
        with:
          node-version: 20
          cache: 'npm'

      - run: npm ci

      - name: Run Chromatic
        uses: chromaui/action@latest
        with:
          projectToken: ${{ secrets.CHROMATIC_PROJECT_TOKEN }}
          exitZeroOnChanges: true  # Don't fail CI on visual changes
          autoAcceptChanges: main  # Auto-accept on main branch merges
The exitZeroOnChanges: true setting prevents visual changes from blocking CI. Instead, Chromatic posts a status check on the PR that links to the review dashboard. The reviewer approves or rejects changes alongside the code review.
Percy in GitHub Actions
# .github/workflows/percy.yml
name: Visual Regression Tests

on:
  pull_request:
    branches: [main]

jobs:
  percy:
    runs-on: ubuntu-latest
    steps:
      - uses: actions/checkout@v4

      - uses: actions/setup-node@v4
        with:
          node-version: 20
          cache: 'npm'

      - run: npm ci

      - name: Build Storybook
        run: npx storybook build

      - name: Run Percy
        run: npx percy storybook ./storybook-static
        env:
          PERCY_TOKEN: ${{ secrets.PERCY_TOKEN }}
Both tools post a GitHub status check that links directly to the visual review dashboard. This integrates naturally into existing code review workflows — the reviewer sees the code diff in GitHub and the visual diff in Percy or Chromatic side by side. For more CI/CD pipeline patterns, see our guide on CI/CD for Node.js projects using GitHub Actions.
Managing Visual Changes and the Review Workflow
The review workflow is where visual regression testing either succeeds or fails as a practice. Without clear guidelines, teams either approve everything blindly or get stuck reviewing hundreds of diffs.
Establish ownership. Assign visual review responsibility to the developer who made the change. They know whether the visual diff is intentional (a design update) or unintentional (a side effect of refactoring).
Batch related changes. If a CSS variable change affects 30 components, approve them as a group rather than individually. Both tools support bulk approval for this reason.
Keep stories focused. A story that renders an entire page produces large, noisy diffs. Stories that render individual components in specific states produce small, meaningful diffs that are fast to review.
Set thresholds for acceptable change. Anti-aliasing and font rendering can produce tiny pixel differences across runs. Both tools support configurable sensitivity thresholds to ignore sub-pixel differences that humans wouldn’t notice.
Real-World Scenario: Adding Visual Tests to a Component Library
Consider a team maintaining a shared React component library used by three product teams. The library has 60 components with Storybook documentation, but no visual testing. Twice in the past quarter, a CSS change in one component caused layout regressions in other components that the product teams discovered only after deploying to staging.
The team adopts Chromatic because they already use Storybook heavily and want the first-party integration. They add Chromatic to their CI pipeline and run the first build, which establishes baselines for all 180 stories across the 60 components. The setup takes less than an hour because Chromatic reads existing stories without any additional configuration.
During the first sprint, a developer updates the padding in the Card component. Chromatic flags visual diffs in the Card component itself plus two composite components (ProductCard and UserProfile) that use Card internally. Without visual testing, the developer would have checked only the Card component and missed the downstream effects. Now, the developer sees all three diffs in the review dashboard and adjusts the padding to work across all contexts.
The key trade-off is snapshot cost. With 180 stories across three viewport sizes, each build consumes 540 snapshots. On the free tier of 5,000 snapshots per month, that allows roughly nine builds — enough for a small team but tight for a busy library with frequent PRs. The team mitigates this by using Chromatic’s TurboSnap feature, which only captures stories affected by the current code change rather than the entire library.
When to Use Visual Regression Testing
- You maintain a component library or design system where visual consistency across components is critical
- Your team has experienced CSS regressions that slipped through code review and unit tests
- You use Storybook and want to turn existing stories into automated visual tests without writing additional test code
- Your application supports multiple viewports or browsers where layout differences are common
- Design fidelity matters for your product and you need a systematic way to review visual changes during PRs
When NOT to Use Visual Regression Testing
- Your UI is primarily text-based or terminal-based with minimal visual styling — functional tests cover this better
- Your team doesn’t have the bandwidth to review visual diffs regularly — unreviewed diffs accumulate and the tool becomes noise that everyone ignores
- Your application’s UI changes on every render due to live data, real-time feeds, or heavy animation — the false positive rate will be too high to be useful
- You’re building a prototype where the UI changes daily — establishing baselines is pointless when everything is in flux
Common Mistakes with Visual Regression Testing
- Not handling dynamic content. Components that display timestamps, random data, or animated elements produce different screenshots on every run. Use deterministic props in stories and freeze dynamic content before capture.
- Capturing too many viewports. Testing every component at five viewport widths multiplies your snapshot count and review burden. Start with two viewports (mobile and desktop) and add more only for components with complex responsive behavior.
- Approving diffs without reviewing them. Visual testing only works if someone actually looks at the diffs. Bulk-approving everything defeats the purpose. Assign visual review to the developer who made the change — they have the context to judge whether a diff is intentional.
- Testing implementation details visually. A story that renders a component with mock data visible in the screenshot couples the visual test to the mock data. Keep stories focused on visual states (loading, error, empty, populated) rather than specific data values.
- Running visual tests on every commit. Visual tests are slower and more expensive than unit tests. Run them on pull requests, not on every push to a feature branch. This keeps costs manageable while still catching regressions before merge.
- Skipping Storybook best practices. Visual regression testing amplifies the quality of your Storybook stories. If stories are incomplete or don’t cover edge states, your visual tests will have the same gaps. Invest in comprehensive stories for your most critical components. For styling patterns that affect component rendering, see our guide on Tailwind CSS best practices for React and Next.js.
Conclusion
Visual regression testing catches the class of UI bugs that unit tests, integration tests, and even end-to-end tests miss entirely — CSS regressions, layout shifts, and unintended visual side effects. Start by choosing between Chromatic (best for Storybook-native integration and component hosting) and Percy (best for cross-browser coverage and page-level testing). Connect the tool to your existing Storybook stories, integrate it into your CI pipeline, and establish a review workflow where the developer who changed the code reviews the visual diffs.
Focus on your most critical components first, keep stories deterministic to avoid false positives, and expand coverage gradually as your team builds the habit of reviewing visual changes alongside code changes. For your next step, explore our guide on building a React app with Next.js to see how these testing patterns fit into a full-stack React project.