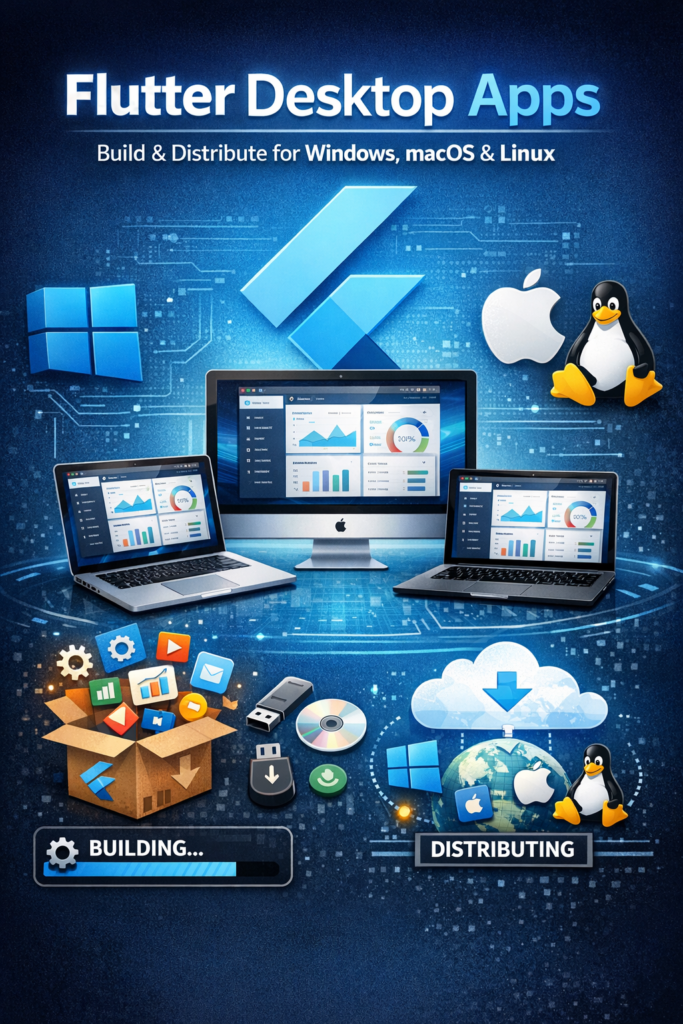
Flutter is no longer limited to mobile and web. Today, Flutter desktop allows developers to build native applications for Windows, macOS, and Linux from a single codebase. This opens the door to shared UI logic, faster development cycles, and consistent user experiences across all major platforms.
In this guide, you will learn how Flutter desktop works, how to build desktop apps with proper UI considerations, and how to package and distribute them correctly for each operating system. We’ll cover real-world challenges and solutions that production desktop apps require.
Why Build Desktop Apps with Flutter?
Desktop applications remain essential for productivity tools, internal enterprise systems, and cross-platform products. Flutter makes desktop development more approachable by unifying the development experience across platforms.
Key advantages of Flutter desktop include:
- Single codebase: Share 80-95% of code between mobile, web, and desktop
- Native performance: Flutter compiles to native code, not a web wrapper
- Consistent UI: Identical look and behavior across platforms
- Shared business logic: Reuse models, services, and state management from mobile apps
- Faster iteration: Hot reload works on desktop just like mobile
Teams already using Flutter for mobile can expand to desktop without learning new frameworks or rewriting existing logic.
Current State of Flutter Desktop
Flutter desktop is stable and production-ready. Major applications like the Canonical Ubuntu installer and various enterprise tools are built with Flutter desktop. However, each platform has its own specifics you should understand.
Windows: Uses Win32 APIs for windowing and rendering. Has the largest desktop market share. Supports both x64 and ARM64 architectures.
macOS: Uses Cocoa for windowing and Metal for rendering. Requires code signing and notarization for distribution. Supports Intel and Apple Silicon.
Linux: Uses GTK for windowing. Distribution varies across distros. Less standardized but growing in enterprise usage.
Flutter abstracts most platform differences, but awareness of these specifics helps when troubleshooting or optimizing platform-specific behavior.
Setting Up Desktop Support
Before building a desktop app, enable the target platforms in your Flutter configuration.
# Enable desktop platforms
flutter config --enable-windows-desktop
flutter config --enable-macos-desktop
flutter config --enable-linux-desktop

# Verify configuration
flutter config

# Check available devices
flutter devices
Create a new desktop-enabled project or add desktop support to an existing project:
# New project with desktop support
flutter create my_desktop_app
cd my_desktop_app

# Add desktop to existing project
flutter create --platforms=windows,macos,linux .
Flutter automatically generates platform-specific folders (windows/, macos/, linux/) containing native project files and configuration.
Desktop App Structure in Flutter
A Flutter desktop project shares most of its structure with mobile apps, making code sharing straightforward.
my_desktop_app/
├── lib/                    # Shared Dart code
│   ├── main.dart
│   ├── screens/
│   ├── widgets/
│   └── services/
├── windows/                # Windows-specific native code
│   ├── runner/
│   └── CMakeLists.txt
├── macos/                  # macOS-specific native code
│   ├── Runner/
│   └── Runner.xcworkspace
├── linux/                  # Linux-specific native code
│   ├── my_app/
│   └── CMakeLists.txt
├── android/                # Mobile platforms (optional)
├── ios/
└── pubspec.yaml
The lib/ folder contains all shared UI and logic. Platform folders handle windowing, native integrations, and platform-specific configuration. This structure allows you to customize behavior per platform when needed while keeping most code shared.
Desktop UI Considerations
Desktop users expect different interaction patterns than mobile users. Simply scaling up a mobile UI doesn’t create a good desktop experience.
Mouse and Keyboard Input
Desktop apps must support precise mouse interactions and keyboard navigation:
// Keyboard shortcuts
class MyApp extends StatelessWidget {
  @override
  Widget build(BuildContext context) {
    return Shortcuts(
      shortcuts: {
        LogicalKeySet(LogicalKeyboardKey.control, LogicalKeyboardKey.keyS):
          SaveIntent(),
        LogicalKeySet(LogicalKeyboardKey.control, LogicalKeyboardKey.keyZ):
          UndoIntent(),
        LogicalKeySet(LogicalKeyboardKey.escape):
          CloseIntent(),
      },
      child: Actions(
        actions: {
          SaveIntent: CallbackAction(
            onInvoke: (intent) => _handleSave(),
          ),
          UndoIntent: CallbackAction(
            onInvoke: (intent) => _handleUndo(),
          ),
        },
        child: Focus(
          autofocus: true,
          child: MyAppContent(),
        ),
      ),
    );
  }
}

class SaveIntent extends Intent {}
class UndoIntent extends Intent {}
class CloseIntent extends Intent {}
Responsive Layouts for Desktop
Desktop windows can be resized to any dimension. Your layout must adapt gracefully:
class ResponsiveLayout extends StatelessWidget {
  @override
  Widget build(BuildContext context) {
    return LayoutBuilder(
      builder: (context, constraints) {
        if (constraints.maxWidth > 1200) {
          return WideLayout();      // Three-column layout
        } else if (constraints.maxWidth > 800) {
          return MediumLayout();    // Two-column layout
        } else {
          return NarrowLayout();    // Single-column layout
        }
      },
    );
  }
}
Context Menus and Right-Click
Desktop users expect right-click context menus:
GestureDetector(
  onSecondaryTapUp: (details) {
    showMenu(
      context: context,
      position: RelativeRect.fromLTRB(
        details.globalPosition.dx,
        details.globalPosition.dy,
        details.globalPosition.dx,
        details.globalPosition.dy,
      ),
      items: [
        PopupMenuItem(value: 'copy', child: Text('Copy')),
        PopupMenuItem(value: 'paste', child: Text('Paste')),
        PopupMenuItem(value: 'delete', child: Text('Delete')),
      ],
    ).then((value) {
      if (value != null) handleMenuAction(value);
    });
  },
  child: YourWidget(),
)
Managing Window Behavior
Desktop apps often require window control beyond what Flutter provides by default. The window_manager package offers comprehensive window management:
import 'package:window_manager/window_manager.dart';

void main() async {
  WidgetsFlutterBinding.ensureInitialized();

  await windowManager.ensureInitialized();

  WindowOptions windowOptions = WindowOptions(
    size: Size(1200, 800),
    minimumSize: Size(800, 600),
    center: true,
    backgroundColor: Colors.transparent,
    skipTaskbar: false,
    titleBarStyle: TitleBarStyle.hidden,  // For custom title bar
  );

  windowManager.waitUntilReadyToShow(windowOptions, () async {
    await windowManager.show();
    await windowManager.focus();
  });

  runApp(MyApp());
}
For a custom title bar that works across platforms:
class CustomTitleBar extends StatelessWidget {
  @override
  Widget build(BuildContext context) {
    return GestureDetector(
      onPanStart: (_) => windowManager.startDragging(),
      child: Container(
        height: 40,
        color: Theme.of(context).primaryColor,
        child: Row(
          children: [
            Padding(
              padding: EdgeInsets.symmetric(horizontal: 16),
              child: Text('My App', style: TextStyle(color: Colors.white)),
            ),
            Spacer(),
            IconButton(
              icon: Icon(Icons.minimize, color: Colors.white),
              onPressed: () => windowManager.minimize(),
            ),
            IconButton(
              icon: Icon(Icons.crop_square, color: Colors.white),
              onPressed: () async {
                if (await windowManager.isMaximized()) {
                  windowManager.unmaximize();
                } else {
                  windowManager.maximize();
                }
              },
            ),
            IconButton(
              icon: Icon(Icons.close, color: Colors.white),
              onPressed: () => windowManager.close(),
            ),
          ],
        ),
      ),
    );
  }
}
File System and Native Access
Desktop apps frequently interact with local files and system resources. Flutter provides packages for common file operations:
import 'package:file_picker/file_picker.dart';
import 'package:path_provider/path_provider.dart';

// Pick a file
Future pickFile() async {
  FilePickerResult? result = await FilePicker.platform.pickFiles(
    type: FileType.custom,
    allowedExtensions: ['pdf', 'doc', 'docx'],
  );

  if (result != null) {
    File file = File(result.files.single.path!);
    // Process file
  }
}

// Save to documents directory
Future saveFile(String content) async {
  final directory = await getApplicationDocumentsDirectory();
  final file = File('${directory.path}/my_document.txt');
  await file.writeAsString(content);
}

// Pick save location
Future saveFileAs(String content) async {
  String? outputPath = await FilePicker.platform.saveFile(
    dialogTitle: 'Save Document',
    fileName: 'document.txt',
  );

  if (outputPath != null) {
    await File(outputPath).writeAsString(content);
  }
}
Packaging Flutter Desktop Apps
Building the app is only half the work. Proper packaging and distribution are essential for a professional product.
Windows Distribution
Windows builds produce an executable and required DLLs:
# Build release version
flutter build windows --release

# Output location
# build/windows/runner/Release/
The output folder contains your .exe and all required dependencies. For distribution, create an installer using tools like Inno Setup or MSIX:
; Inno Setup script example
[Setup]
AppName=My Flutter App
AppVersion=1.0.0
DefaultDirName={pf}\MyFlutterApp
OutputBaseFilename=MyFlutterApp-Setup

[Files]
Source: "build\windows\runner\Release\*"; DestDir: "{app}"; Flags: recursesubdirs

[Icons]
Name: "{commondesktop}\My Flutter App"; Filename: "{app}\my_app.exe"
For Microsoft Store distribution, use MSIX packaging. Code signing with a certificate improves trust and eliminates security warnings.
macOS Distribution
macOS requires code signing and notarization due to Gatekeeper security:
# Build release version
flutter build macos --release

# Output location
# build/macos/Build/Products/Release/MyApp.app
For distribution outside the Mac App Store:
# Sign the app
codesign --deep --force --verify --verbose \
  --sign "Developer ID Application: Your Name (TEAM_ID)" \
  build/macos/Build/Products/Release/MyApp.app

# Create a zip for notarization
ditto -c -k --keepParent "MyApp.app" "MyApp.zip"

# Submit for notarization
xcrun notarytool submit MyApp.zip \
  --apple-id "your@email.com" \
  --password "app-specific-password" \
  --team-id "TEAM_ID" \
  --wait

# Staple the notarization ticket
xcrun stapler staple MyApp.app

# Create DMG for distribution
hdiutil create -volname "My App" -srcfolder MyApp.app -ov MyApp.dmg
Without signing and notarization, macOS will block your app from running.
Linux Distribution
Linux distributions vary widely, so multiple packaging options exist:
# Build release version
flutter build linux --release

# Output location
# build/linux/x64/release/bundle/
AppImage is often the simplest option for broad compatibility:
# Using appimage-builder
appimage-builder --recipe AppImageBuilder.yml
Snap packages work well for Ubuntu and derivatives. Flatpak provides sandboxed distribution across distributions. DEB/RPM packages work for specific distribution families.
Implementing Auto-Updates
Desktop users expect applications to stay current. While Flutter has no built-in updater, you can implement update checking:
class UpdateService {
  static const String currentVersion = '1.0.0';
  static const String updateUrl = 'https://api.myapp.com/version';

  Future checkForUpdates() async {
    try {
      final response = await http.get(Uri.parse(updateUrl));
      final data = json.decode(response.body);

      if (_isNewerVersion(data['version'], currentVersion)) {
        return UpdateInfo(
          version: data['version'],
          downloadUrl: data['downloadUrl'],
          releaseNotes: data['releaseNotes'],
        );
      }
    } catch (e) {
      // Handle error silently
    }
    return null;
  }

  bool _isNewerVersion(String remote, String current) {
    // Compare semantic versions
    final remoteParts = remote.split('.').map(int.parse).toList();
    final currentParts = current.split('.').map(int.parse).toList();

    for (int i = 0; i < 3; i++) {
      if (remoteParts[i] > currentParts[i]) return true;
      if (remoteParts[i] < currentParts[i]) return false;
    }
    return false;
  }
}
CI/CD for Flutter Desktop
Automating builds ensures consistency and saves time. Here's a GitHub Actions workflow for multi-platform builds:
name: Build Desktop Apps

on:
  push:
    tags:
      - 'v*'

jobs:
  build-windows:
    runs-on: windows-latest
    steps:
      - uses: actions/checkout@v4
      - uses: subosito/flutter-action@v2
        with:
          flutter-version: '3.16.0'
      - run: flutter build windows --release
      - uses: actions/upload-artifact@v3
        with:
          name: windows-build
          path: build/windows/runner/Release/

  build-macos:
    runs-on: macos-latest
    steps:
      - uses: actions/checkout@v4
      - uses: subosito/flutter-action@v2
        with:
          flutter-version: '3.16.0'
      - run: flutter build macos --release
      - uses: actions/upload-artifact@v3
        with:
          name: macos-build
          path: build/macos/Build/Products/Release/

  build-linux:
    runs-on: ubuntu-latest
    steps:
      - uses: actions/checkout@v4
      - run: sudo apt-get update && sudo apt-get install -y clang cmake ninja-build pkg-config libgtk-3-dev
      - uses: subosito/flutter-action@v2
        with:
          flutter-version: '3.16.0'
      - run: flutter build linux --release
      - uses: actions/upload-artifact@v3
        with:
          name: linux-build
          path: build/linux/x64/release/bundle/
Common Pitfalls to Avoid
Ignoring platform differences: Desktop platforms have different UX expectations. Test on all target platforms, not just your development machine.
Skipping code signing: Unsigned apps trigger security warnings and reduce user trust. Invest in proper signing certificates.
Treating desktop like mobile: Desktop apps need proper keyboard navigation, window management, and responsive layouts. Don't just scale up mobile UI.
Ignoring accessibility: Desktop users rely heavily on keyboard navigation and screen readers. Test with accessibility tools.
Forgetting about HiDPI: Many desktop users have high-resolution displays. Ensure your assets and layouts scale correctly.
Conclusion
Flutter desktop enables developers to build native Windows, macOS, and Linux applications using a single, shared codebase. By understanding platform differences, optimizing UI for desktop usage, and handling distribution correctly, you can ship professional desktop applications with confidence.
The combination of hot reload, widget-based UI, and platform-native performance makes Flutter an excellent choice for cross-platform desktop development. Start with proper window management and keyboard support, then focus on platform-specific packaging for each target OS.
For sharing logic across platforms, read Building Offline-First Flutter Apps: Local Storage and Sync. For scalable architecture patterns, see Test-Driven Development (TDD) & Clean Architecture in Flutter. You can also explore the Flutter desktop documentation for additional guidance.