Introduction
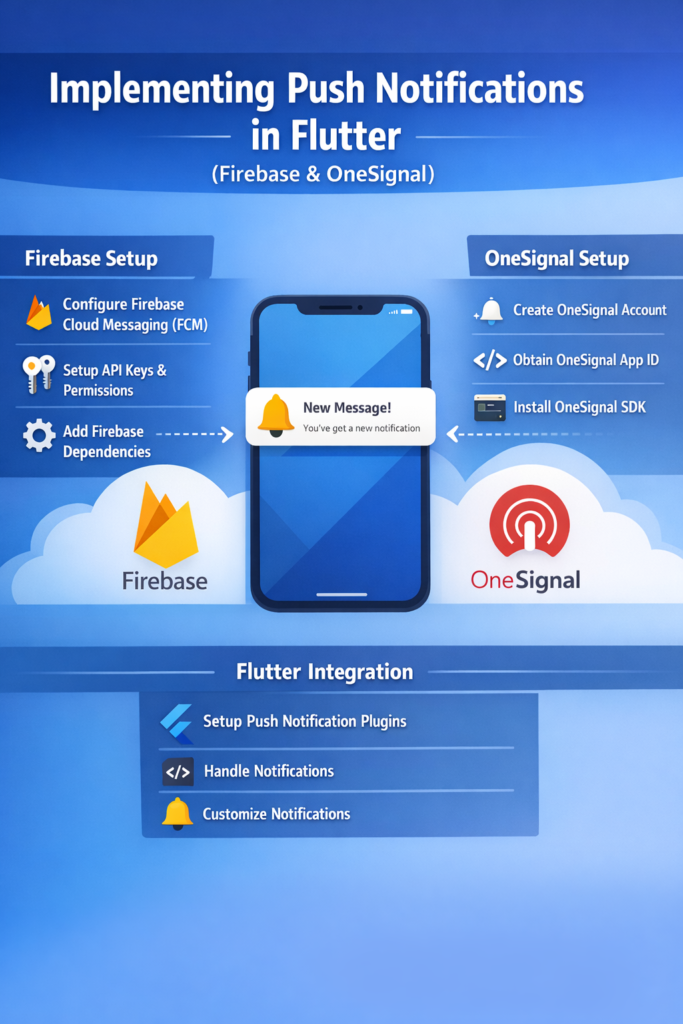
Push notifications are one of the most effective ways to keep users engaged with a mobile app. They enable real-time alerts, reminders, and updates even when the app is closed. In Flutter, the most common approaches use Firebase Cloud Messaging (FCM) and OneSignal. While both solutions solve the same problem, they differ in setup, flexibility, and backend control. In this guide, you will learn how push notifications work in Flutter, how to implement them using Firebase and OneSignal, and when to choose one over the other. Whether you are building a real-time messaging app or an e-commerce platform, push notifications are essential for keeping users informed.
Why Push Notifications Matter in Flutter Apps
Push notifications directly impact user retention and engagement. Studies show that apps with push notifications see 88% higher engagement than those without. Therefore, implementing them correctly is essential for production apps.
• Deliver timely updates about orders, messages, or events
• Re-engage inactive users with personalized content
• Support real-time alerts for critical information
• Improve user experience with proactive communication
• Enable transactional messaging for confirmations and receipts
However, notifications must always provide value to avoid user fatigue. Poorly implemented notifications lead to app uninstalls, while well-designed ones increase daily active users significantly.
How Push Notifications Work
Before implementing notifications, it helps to understand the basic flow that makes them possible.
• App registers with a notification service (FCM or OneSignal)
• Device receives a unique push token identifying it
• Token is sent to your backend and stored securely
• Backend sends messages to the notification service with target tokens
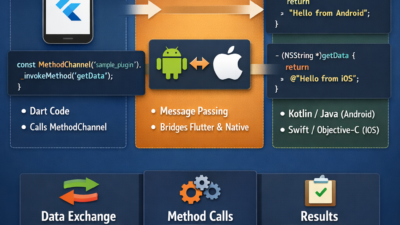
• Service delivers notifications to devices through platform channels
This architecture keeps sensitive credentials on the server and ensures reliable delivery. The notification service acts as a reliable intermediary that handles retry logic, device state management, and platform-specific delivery requirements.
Firebase Cloud Messaging in Flutter
Firebase Cloud Messaging is Google’s push notification service and is widely used in Flutter apps due to its deep integration with the Firebase ecosystem.
Why Use Firebase Cloud Messaging
FCM integrates naturally with Flutter and offers strong control over messaging architecture.
• Official Flutter support through firebase_messaging package
• Works on Android and iOS with consistent API
• Supports notification and data messages
• Integrates with Firebase Authentication for user targeting
• Scales to millions of devices at no additional cost
• Topic messaging for broadcast notifications
Because of this tight integration, FCM is often the default choice for Flutter developers already using Firebase for authentication, storage, or analytics.
Setting Up Firebase in Flutter
Start by creating a Firebase project in the Firebase Console and adding your Flutter app for both iOS and Android platforms.
Install Dependencies
dependencies:
  firebase_core: ^3.0.0
  firebase_messaging: ^15.0.0
  flutter_local_notifications: ^17.0.0
The flutter_local_notifications package is needed to display notifications when the app is in the foreground, as FCM only shows notifications automatically in background or terminated states.
Initialize Firebase
void main() async {
  WidgetsFlutterBinding.ensureInitialized();
  await Firebase.initializeApp();
  runApp(MyApp());
}
Configure Android
Download google-services.json from Firebase Console and place it in android/app/. Update your build.gradle files to include the Google Services plugin.
Configure iOS
Download GoogleService-Info.plist and add it to your Xcode project. Enable Push Notifications and Background Modes capabilities in Xcode, then add the following to your Info.plist:
<key>FirebaseAppDelegateProxyEnabled</key>
<false/>
Requesting Notification Permissions
Permissions must be handled explicitly, especially on iOS where users must grant permission before receiving notifications.
Future<void> requestPermissions() async {
  final messaging = FirebaseMessaging.instance;

  NotificationSettings settings = await messaging.requestPermission(
    alert: true,
    badge: true,
    sound: true,
    provisional: false,
    announcement: false,
    carPlay: false,
    criticalAlert: false,
  );

  if (settings.authorizationStatus == AuthorizationStatus.authorized) {
    print('User granted permission');
  } else if (settings.authorizationStatus == AuthorizationStatus.provisional) {
    print('User granted provisional permission');
  } else {
    print('User declined permission');
  }
}
Always explain why notifications are needed before requesting permission. Show a pre-permission dialog explaining the benefits, then request the actual system permission.
Getting and Managing FCM Tokens
Each device receives a unique token used for targeting notifications. This token can change, so you must handle updates.
Future<void> setupToken() async {
  // Get initial token
  final token = await FirebaseMessaging.instance.getToken();
  await sendTokenToBackend(token);

  // Listen for token refresh
  FirebaseMessaging.instance.onTokenRefresh.listen((newToken) {
    sendTokenToBackend(newToken);
  });
}

Future<void> sendTokenToBackend(String? token) async {
  if (token == null) return;

  // Send to your backend API
  await api.updatePushToken(
    userId: currentUserId,
    token: token,
    platform: Platform.isIOS ? 'ios' : 'android',
  );
}
Store the token associated with the user ID on your backend so you can target specific users with notifications.
Handling Notifications in Flutter
Notification handling depends on the app state. FCM behaves differently when the app is in foreground, background, or terminated.
Foreground Messages
FirebaseMessaging.onMessage.listen((RemoteMessage message) {
  print('Foreground message: ${message.notification?.title}');

  // Show local notification since FCM doesn't display in foreground
  showLocalNotification(
    title: message.notification?.title ?? '',
    body: message.notification?.body ?? '',
    payload: message.data,
  );
});
Background Messages
// This must be a top-level function
@pragma('vm:entry-point')
Future<void> _firebaseMessagingBackgroundHandler(RemoteMessage message) async {
  await Firebase.initializeApp();
  print('Background message: ${message.messageId}');
  // Handle data payload
}

void main() async {
  WidgetsFlutterBinding.ensureInitialized();
  await Firebase.initializeApp();

  FirebaseMessaging.onBackgroundMessage(_firebaseMessagingBackgroundHandler);

  runApp(MyApp());
}
Notification Tap Handling
// Handle notification tap when app is in background
FirebaseMessaging.onMessageOpenedApp.listen((RemoteMessage message) {
  navigateToScreen(message.data);
});

// Handle notification tap when app was terminated
Future<void> checkInitialMessage() async {
  RemoteMessage? initialMessage =
      await FirebaseMessaging.instance.getInitialMessage();

  if (initialMessage != null) {
    navigateToScreen(initialMessage.data);
  }
}
Notification Messages vs Data Messages
FCM supports two message types with different behaviors.
Notification Messages
• Handled automatically by the OS in background
• Display title and body without app code
• Simpler to implement
• Limited customization options
Data Messages
• Always handled by app code
• Full control over display and behavior
• Can be processed silently
• Require more implementation work
// Notification message from backend
{
  "notification": {
    "title": "New message",
    "body": "You have a new message from John"
  },
  "token": "device_token"
}

// Data message from backend
{
  "data": {
    "type": "new_message",
    "senderId": "123",
    "conversationId": "456"
  },
  "token": "device_token"
}
For maximum flexibility, use data messages and handle display yourself using flutter_local_notifications.
Topic Messaging with FCM
Topics allow you to send notifications to groups of users who have subscribed to specific interests.
// Subscribe to a topic
await FirebaseMessaging.instance.subscribeToTopic('sports_news');

// Unsubscribe from a topic
await FirebaseMessaging.instance.unsubscribeFromTopic('sports_news');
From your backend, send to all subscribers at once without managing individual tokens.
Using OneSignal with Flutter
OneSignal is a third-party notification platform that simplifies push notifications with a focus on marketing and engagement features.
Why Choose OneSignal
OneSignal focuses on ease of use and advanced engagement features.
• Simple setup with minimal configuration
• Built-in analytics and delivery tracking
• Advanced user segmentation
• Scheduling and automation workflows
• No custom backend required for basic use
• A/B testing for notification content
Because of this, OneSignal is popular for marketing-driven apps where engagement metrics matter.
Setting Up OneSignal in Flutter
Install the OneSignal Flutter SDK and configure platform requirements.
dependencies:
  onesignal_flutter: ^5.0.0
Initialize OneSignal
void main() async {
  WidgetsFlutterBinding.ensureInitialized();

  OneSignal.Debug.setLogLevel(OSLogLevel.verbose);
  OneSignal.initialize("YOUR_ONESIGNAL_APP_ID");

  // Request permission
  OneSignal.Notifications.requestPermission(true);

  runApp(MyApp());
}
After setup, OneSignal handles device registration automatically without additional backend code.
User Identification
// Set external user ID for targeting
await OneSignal.login(userId);

// Logout when user signs out
await OneSignal.logout();
Handling Notifications with OneSignal
OneSignal provides callbacks for notification events with rich context.
void setupOneSignalHandlers() {
  // Notification received in foreground
  OneSignal.Notifications.addForegroundWillDisplayListener((event) {
    print('Notification: ${event.notification.title}');
    // Optionally prevent display
    // event.preventDefault();
    event.notification.display();
  });

  // Notification clicked
  OneSignal.Notifications.addClickListener((event) {
    final data = event.notification.additionalData;
    navigateBasedOnData(data);
  });
}
Tags and Segments
// Add tags for segmentation
await OneSignal.User.addTags({
  'user_type': 'premium',
  'interests': 'technology',
});

// Remove tags
await OneSignal.User.removeTags(['interests']);
Tags enable powerful segmentation from the OneSignal dashboard without backend changes.
Firebase vs OneSignal: Decision Guide
Choosing between Firebase and OneSignal depends on your project requirements and team capabilities.
Choose Firebase When
• You need full backend control over notification logic
• Secure transactional messages are critical
• You already use Firebase for auth, database, or analytics
• You want to integrate with Cloud Functions
• Cost is a primary concern (FCM is free)
Choose OneSignal When
• Fast setup is a priority
• Marketing automation is important
• You need advanced analytics and A/B testing
• Non-technical team members will send notifications
• You want to avoid backend development
Using Both Together
Some apps use FCM for transactional notifications (order confirmations, security alerts) and OneSignal for marketing campaigns. This provides the best of both approaches but increases complexity.
Best Practices for Push Notifications
Reliable notifications require thoughtful design and implementation. Following these practices improves opt-in rates and engagement.
• Ask permission at the right moment after showing value
• Keep messages short, clear, and actionable
• Avoid sending too often to prevent notification fatigue
• Handle token refresh events to maintain deliverability
• Test on real devices across iOS and Android
• Implement deep linking for contextual navigation
• Use analytics to track open rates and optimize timing
Common Pitfalls to Avoid
Requesting Permission Too Early
Users are more likely to decline without context. Show the value of notifications first through a pre-permission dialog.
Ignoring Token Updates
Push tokens can change when the app is reinstalled, restored from backup, or updated. Always listen for token refresh events.
Overusing Notifications
Too many messages lead to uninstalls. Respect user preferences and provide notification settings within your app.
Not Testing All States
Test notifications in foreground, background, and terminated states on both platforms. Behavior differs significantly.
Testing Push Notifications
Thorough testing prevents production issues that frustrate users.
// Print FCM token for testing
final token = await FirebaseMessaging.instance.getToken();
print('FCM Token: $token');
Use the Firebase Console or OneSignal dashboard to send test notifications. Test each scenario:
• App in foreground
• App in background
• App terminated
• Device in Do Not Disturb mode
• Low battery mode
Conclusion
Implementing push notifications in Flutter with Firebase and OneSignal allows you to deliver timely, relevant updates to users across platforms. Firebase Cloud Messaging offers full control and deep backend integration, ideal for transactional notifications and apps already in the Firebase ecosystem. OneSignal simplifies setup and provides powerful engagement tools perfect for marketing-focused applications. If you are building robust Flutter systems, read Building Offline-First Flutter Apps: Local Storage and Sync. For related mobile development patterns, explore Flutter State Management Mistakes. You can also reference the Firebase Cloud Messaging documentation and the OneSignal documentation. With the right strategy, push notifications become a powerful channel for user engagement that drives retention and business growth.

1 Comment