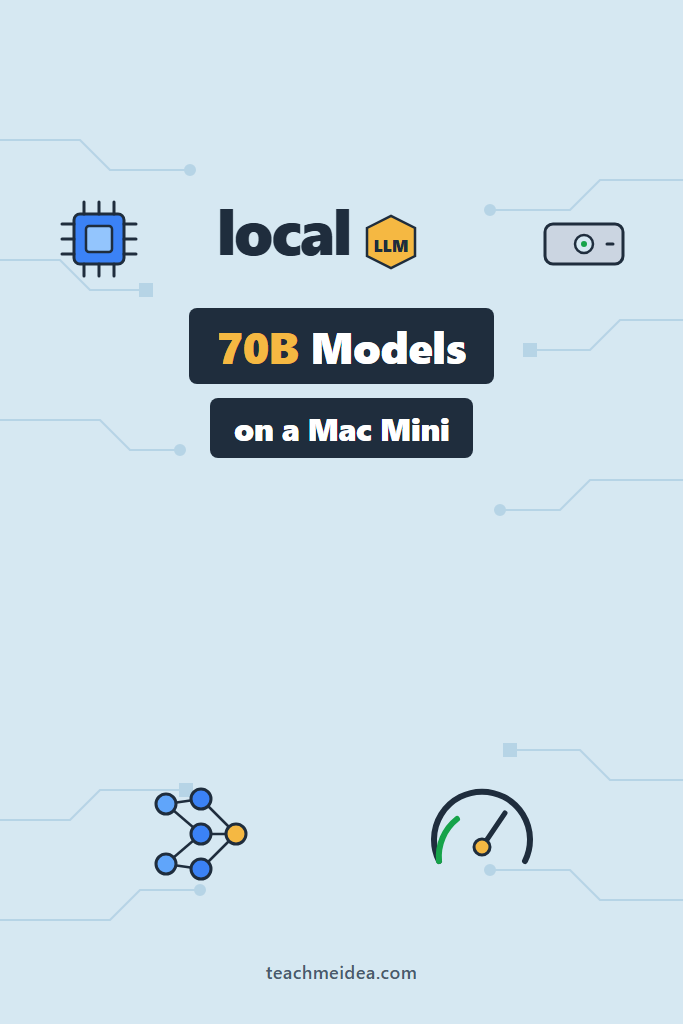
If you want a private, always-on machine that can run a 70-billion-parameter model without a noisy GPU rig or a cloud bill, the Apple Silicon Mac Mini has quietly become the most cost-effective option. Running 70B models on a Mac Mini is realistic today because of unified memory: the CPU and GPU share one large, fast memory pool, so a single small box can hold a model that would otherwise need a $2,000+ graphics card. This guide walks through the exact hardware to buy, the quantization math that decides whether a model fits, the macOS settings you must change, and the inference speeds you can actually expect.
This is a hands-on tutorial for intermediate developers who are comfortable in a terminal and want a local inference workstation for coding assistants, RAG backends, or private experimentation. You do not need prior machine learning experience. You do need patience with a few configuration steps that the App Store will never mention.
Why a Mac Mini Can Run a 70B Model at All
The reason a small desktop competes with a discrete GPU comes down to one architectural decision: unified memory. On a traditional PC, your model weights have to fit inside the GPU’s dedicated VRAM, which tops out at 24GB on most consumer cards. A 70B model in 4-bit form needs roughly 42GB, so it simply will not load on a single 24GB card.
Apple Silicon takes a different approach. The M-series chips put CPU, GPU, and a large memory pool on the same package, and the GPU can address nearly all of it. As a result, a Mac Mini configured with 64GB of unified memory exposes around 48–56GB to the GPU for inference. That headroom is exactly what a quantized 70B model needs.
Memory bandwidth is the other half of the story. Inference speed for a single request is mostly bound by how fast the chip can stream weights from memory, not by raw compute. Therefore the M4 Pro’s memory bandwidth (around 273 GB/s) and the M4 Max’s (roughly 410–546 GB/s) translate fairly directly into tokens per second. Keep that relationship in mind, because it explains every performance number later in this guide.
The $1,600 Hardware Configuration
Prices shift constantly, so treat the following as a configuration target rather than an exact quote. The build that lands closest to the $1,600 mark in 2026 is a Mac Mini with the M4 Pro chip and a 64GB unified memory upgrade. The chip tier matters less than the memory; the memory is what determines whether a 70B model loads at all.
| Component | Recommended choice | Why it matters |
|---|---|---|
| Chip | M4 Pro (12–14 core) | Higher memory bandwidth than the base M4 |
| Unified memory | 64GB | Fits a 70B model at 4-bit with context headroom |
| Storage | 512GB minimum | A single 70B GGUF file is 25–55GB |
| External SSD | Optional, fast Thunderbolt | Cheaper way to store multiple model files |
The base M4 chip with 24GB is a fine machine for 7B–14B models, but it cannot hold a 70B model regardless of quantization. Consequently, do not try to save money on memory and make it up elsewhere. If your budget is tight, buy refurbished from Apple’s certified store rather than dropping to 48GB, although 48GB does work for more aggressive quantization levels covered below.
The Quantization Math That Decides Everything
Before you download anything, you need to understand the memory budget. A raw 70B model in 16-bit precision is about 140GB, which fits nowhere on consumer hardware. Quantization shrinks each weight to fewer bits, trading a small amount of quality for a massive reduction in size. If quantization formats are new to you, the llama.cpp CPU and quantized LLM guide explains the GGUF format and how these levels are produced.
Here is the practical sizing table for a 70B model in GGUF format. The RAM column includes a rough allowance for the model file plus a modest context window.
| Quantization | Approx. size | Fits 48GB? | Fits 64GB? | Quality notes |
|---|---|---|---|---|
| Q8_0 | ~70 GB | No | No | Near-lossless, too large here |
| Q6_K | ~54 GB | No | Tight | Excellent, little context headroom |
| Q5_K_M | ~48 GB | No | Yes | Very good, recommended if RAM allows |
| Q4_K_M | ~42 GB | Tight | Yes | The sweet spot for most users |
| Q3_K_M | ~34 GB | Yes | Yes | Acceptable, mild quality loss |
| Q2_K | ~26 GB | Yes | Yes | Noticeable degradation, avoid if possible |
For a 64GB Mac Mini, Q4_K_M is the default recommendation. It keeps quality close to the full model while leaving enough memory for a usable context window and the operating system. On a 48GB machine, drop to Q3_K_M. Avoid Q2_K unless you are only testing whether the pipeline works, because the quality loss at 2-bit becomes obvious in reasoning-heavy tasks.
Step 1: Raise the GPU Memory Limit in macOS
By default, macOS caps how much unified memory the GPU is allowed to “wire” for inference. On a 64GB machine the default ceiling is conservative, and a 42GB model can fail to load with an out-of-memory error even though you appear to have enough RAM. The fix is one sysctl command.
# Check total memory (in bytes) so you can size the limit sensibly
sysctl hw.memsize
# Example output on a 64GB machine:
# hw.memsize: 68719476736

# Allow the GPU to wire up to ~56GB (56 * 1024 = 57344 MB)
# Leave ~8GB for macOS and background apps
sudo sysctl iogpu.wired_limit_mb=57344
This setting raises the wired memory ceiling so the GPU can hold the full model. It resets on reboot, which is actually a useful safety net. However, if you want it to persist, create a launch daemon or add it to a startup script. Do not set the limit to your full RAM size, because starving macOS of memory causes the whole system to stutter or freeze under load.
To make the change survive reboots, create a small launch daemon:
# /Library/LaunchDaemons/com.local.iogpu.wiredlimit.plist
sudo tee /Library/LaunchDaemons/com.local.iogpu.wiredlimit.plist > /dev/null <<'EOF'
<?xml version="1.0" encoding="UTF-8"?>
<!DOCTYPE plist PUBLIC "-//Apple//DTD PLIST 1.0//EN"
  "http://www.apple.com/DTDs/PropertyList-1.0.dtd">
<plist version="1.0">
<dict>
  <key>Label</key><string>com.local.iogpu.wiredlimit</string>
  <key>ProgramArguments</key>
  <array>
    <string>/usr/sbin/sysctl</string>
    <string>iogpu.wired_limit_mb=57344</string>
  </array>
  <key>RunAtLoad</key><true/>
</dict>
</plist>
EOF

sudo launchctl load /Library/LaunchDaemons/com.local.iogpu.wiredlimit.plist
Step 2: Install a Runtime (Ollama Is the Fastest Path)
You have three good options for serving a model on Apple Silicon, and each uses Apple’s Metal GPU backend under the hood. For most people, Ollama is the quickest route from zero to a running 70B model, because it handles downloads, quantization selection, and a built-in API server.
# Install Ollama on macOS via Homebrew
brew install ollama

# Start the background server (or run `ollama serve` in its own terminal)
brew services start ollama

# Confirm it is responding
curl http://localhost:11434/api/version
# Expected: {"version":"0.x.x"}
If you want maximum control over quantization files and sampling parameters, use llama.cpp directly instead. For a graphical experience with a model browser and chat UI, LM Studio for local LLMs is the friendlier on-ramp and runs the same Metal backend. The broader trade-offs between these tools are covered in the Ollama local LLM guide, so pick the one that matches how much control you want.
Step 3: Pull and Run a 70B Model
With the runtime installed and the memory limit raised, you can download a model. The first pull is large, so expect to wait while 40GB or so streams to disk. Ollama defaults to a 4-bit quantization for most 70B tags, which is exactly what you want on a 64GB machine.
# Pull a 70B model at its default 4-bit quantization (~42GB download)
ollama pull llama3.3:70b

# Run an interactive session
ollama run llama3.3:70b

# Or specify an explicit quantization tag when one is published
ollama pull llama3.3:70b-instruct-q4_K_M
Watch the first response carefully. When the model loads, macOS commits the weights to GPU memory, and you can verify the GPU is doing the work by opening Activity Monitor and checking the GPU history graph. If inference falls back to the CPU, tokens crawl out at well under one per second, which is the clearest sign that either the memory limit is too low or another large process is hogging RAM.
To use the model from your own code, hit the local API rather than the interactive shell. The endpoint speaks a simple JSON protocol.
import requests

def ask_local_model(prompt: str, model: str = "llama3.3:70b") -> str:
    """Send a prompt to the local Ollama server and return the completion.

    Streaming is disabled here for simplicity; enable it for token-by-token
    output in a real app to keep the UI responsive on slow local hardware.
    """
    response = requests.post(
        "http://localhost:11434/api/generate",
        json={"model": model, "prompt": prompt, "stream": False},
        timeout=300,  # 70B inference on a Mac Mini is slow; allow generous time
    )
    response.raise_for_status()
    return response.json()["response"]

if __name__ == "__main__":
    print(ask_local_model("Explain unified memory in two sentences."))
The generous timeout is not optional. On a Mac Mini, a long answer from a 70B model can take a minute or more, so any client with a default 30-second timeout will throw before the model finishes.
Step 4: Tune Context Length and Keep the Model Warm
Context length is the hidden memory cost that catches people off guard. Every token of context consumes additional memory for the KV cache, and at 70B that cost adds up quickly. If you load a 42GB model and then request a 32K context window, you can push total usage past your wired limit and trigger a reload mid-session.
# Set a sane context window via a Modelfile to control KV cache size
cat > Modelfile <<'EOF'
FROM llama3.3:70b
PARAMETER num_ctx 8192
PARAMETER num_gpu 999
EOF

ollama create llama3.3-70b-8k -f Modelfile
ollama run llama3.3-70b-8k
An 8K context is a comfortable default for coding and chat on 64GB. The num_gpu 999 parameter tells the runtime to offload every layer to the Metal GPU, which you want on Apple Silicon since the GPU shares the same fast memory. Furthermore, keep the model resident between requests. Ollama unloads idle models after a few minutes by default, and reloading 42GB from disk adds a long cold-start delay to the next request. Set OLLAMA_KEEP_ALIVE=-1 to pin it in memory if the Mini is dedicated to inference.
What Speed Should You Actually Expect?
Honest expectations prevent disappointment. A 70B model on a Mac Mini is genuinely usable for interactive work, but it is not as fast as a hosted frontier model behind an API. Because single-request inference is memory-bandwidth bound, you can estimate throughput by dividing the chip’s bandwidth by the model size. The figures below are approximate and vary with context length, quantization, and thermal conditions.
| Configuration | 70B Q4 generation (approx.) | Verdict |
|---|---|---|
| M4 base, 24GB | Does not fit | Not viable |
| M4 Pro, 48GB | ~4–6 tokens/sec (Q3) | Usable, mild quality trade-off |
| M4 Pro, 64GB | ~5–8 tokens/sec (Q4) | The recommended balance |
| M4 Max, 64–128GB | ~9–12 tokens/sec (Q4) | Faster, but well above $1,600 |
At 6 tokens per second, a 300-token answer takes roughly 50 seconds. That cadence works well for asynchronous tasks such as overnight batch summarization, code review of a single file, or a personal coding assistant where you tolerate a short wait. It works poorly for anything that needs sub-second responses or high concurrency. If you need throughput for many simultaneous users, a dedicated serving stack like vLLM for self-hosted LLM serving on a real GPU is the right tool, not a Mac Mini.
A Realistic Use Case: A Private Coding Assistant
Consider a solo developer or a small team that wants a private code assistant without sending source code to a third-party API. A 64GB Mac Mini running a 70B model at Q4 sits on the desk as an always-on endpoint, and editor plugins point at localhost:11434. Over several weeks of daily use, the pattern that emerges is clear: the box excels at thoughtful, single-shot tasks like explaining an unfamiliar module, drafting a migration, or reviewing one file at a time.
The trade-off shows up under concurrency and latency pressure. When two developers hit the same Mini at once, requests queue, and the second person waits noticeably longer. Likewise, autocomplete-style features that expect instant suggestions feel sluggish, so teams usually reserve the local 70B model for deliberate “ask and wait” workflows and keep a smaller, faster model for inline completion. That split, slow-but-private 70B for reasoning and a quick 7B for autocomplete, is the configuration that holds up in practice.
When to Use a Mac Mini for 70B Models
- You want a private, local model for sensitive code or data that cannot leave your machine
- Your workload is single-user and tolerant of 5–60 second responses
- You prefer a quiet, low-power, always-on box over a noisy GPU tower
- You run batch or asynchronous jobs where total throughput matters more than latency
- You already live in the Apple ecosystem and want one machine for dev work and inference
When NOT to Use a Mac Mini for 70B Models
- You need to serve many concurrent users or high request volume
- Your application requires sub-second, real-time responses
- You need the absolute highest quality at full 8-bit or 16-bit precision
- You plan to fine-tune large models rather than just run inference on them
- Your budget makes renting a cloud GPU per hour cheaper than your expected usage
Common Mistakes with 70B Models on a Mac Mini
- Buying the base M4 with 24GB and expecting a 70B model to load; it will not fit at any quantization
- Forgetting to raise the
iogpu.wired_limit_mbceiling, causing out-of-memory errors despite having free RAM - Requesting a huge context window that inflates the KV cache and pushes total memory past the limit
- Using a default short HTTP timeout in client code, which aborts before slow local inference completes
- Setting the wired limit to the full RAM size, starving macOS and freezing the system under load
- Choosing Q2_K to save memory and then blaming the model for poor reasoning quality
Conclusion: A Practical Local Inference Box
Running 70B models on a Mac Mini is no longer a hack; it is a sensible, repeatable setup once you respect the memory math and raise the GPU wiring limit. Buy 64GB of unified memory, run a Q4_K_M quantization, keep context windows reasonable, and you get a quiet, private inference box that handles serious reasoning tasks at a usable pace. Start by pulling a single 70B model with Ollama and benchmarking it against your real workload before deciding whether the speed fits your needs.
For the next step, deepen your understanding of the format choices that drive memory usage with the llama.cpp quantization guide, and if you are weighing local inference against customizing a model for your domain, read fine-tuning vs RAG to decide where your effort belongs.