If you have outgrown hosted APIs and want to run open models like Llama or Qwen on your own hardware, vLLM is the serving engine most teams reach for first. This guide is for backend and platform engineers who need a self-hosted LLM endpoint that handles real concurrency, not a single-user chat loop. You will learn how vLLM works, how to install and launch it, how to call its OpenAI-compatible API, and when it is the wrong tool. By the end, you will have a production-shaped serving setup you can actually deploy.
vLLM matters because naive serving falls apart under load. A simple model.generate() loop processes one request at a time and leaves your expensive GPU mostly idle. vLLM fixes that with smarter memory management and continuous batching, which is why it has become the default open-source inference server for self-hosted deployments.
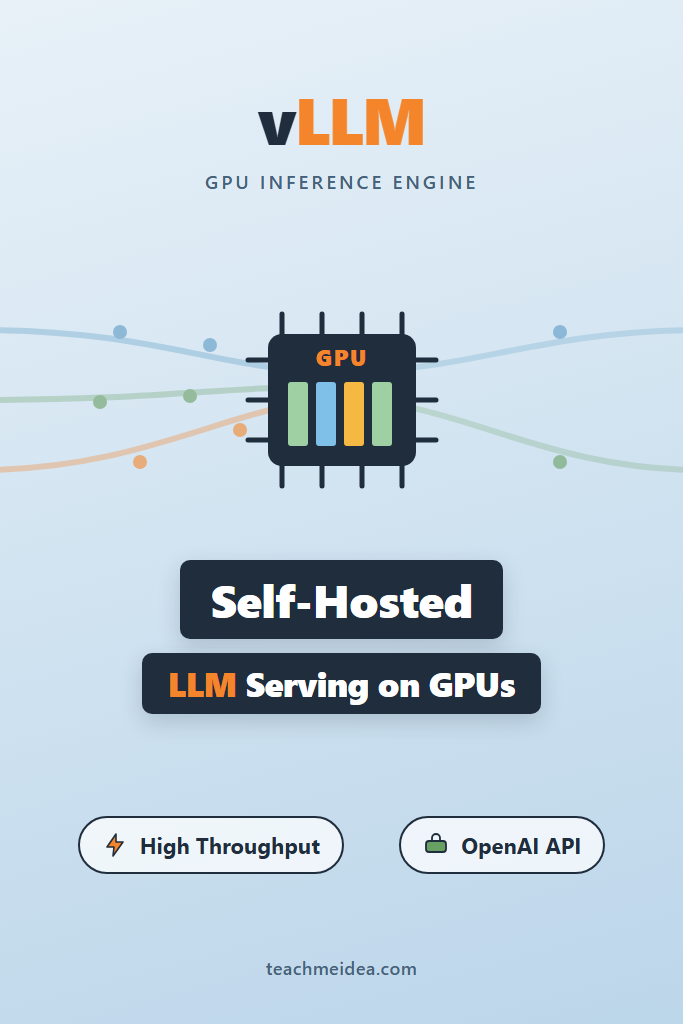
What Is vLLM?
vLLM is an open-source library for fast LLM inference and serving, built around a memory technique called PagedAttention. It maximizes GPU throughput by batching many requests together dynamically and managing the attention cache like an operating system manages virtual memory. As a result, it serves far more concurrent users per GPU than a naive implementation.
The project started at UC Berkeley and is now one of the most widely used inference engines in production. It supports most popular open-weight model families, including Llama, Mistral, Qwen, Gemma, and DeepSeek. Crucially, it ships an OpenAI-compatible HTTP server, so existing client code that targets the OpenAI API often works against vLLM with only a base URL change.
Why PagedAttention Matters
During generation, each request stores a growing key-value (KV) cache in GPU memory. Traditional serving allocates one large contiguous block per request, sized for the worst case. Consequently, memory gets reserved but never used, and the GPU runs out of room long before it runs out of compute.
PagedAttention instead splits the KV cache into small fixed-size blocks, allocated on demand. This is the same idea as paging in an OS, where memory is handed out in pages rather than huge reserved chunks. Therefore, vLLM packs many more sequences into the same GPU and wastes very little memory.
Continuous Batching vs Static Batching
Static batching waits for a fixed group of requests, runs them together, and returns when the slowest one finishes. Meanwhile, short requests sit idle waiting for long ones, which wrecks throughput under mixed traffic. Continuous batching, by contrast, adds and removes requests from the running batch on every decoding step.
In practice, this means a new request can join the batch immediately instead of waiting for the current one to complete. As a result, the GPU stays busy, latency stays predictable, and throughput scales with traffic rather than collapsing under it.
Prerequisites
Before installing vLLM, make sure your environment meets the basics. vLLM targets NVIDIA GPUs by default, though it also supports AMD ROCm, Intel, and CPU backends with varying maturity.
You will need the following:
- An NVIDIA GPU with a recent CUDA driver (compute capability 7.0+, such as T4, A10, A100, L4, or RTX 30/40 series)
- Python 3.9 to 3.12
- Linux (officially supported; Windows works best through WSL2 or Docker)
- Enough VRAM for your target model (roughly 2x the parameter count in GB for FP16, less when quantized)
For sizing, a 7B–8B model in FP16 needs around 16 GB of VRAM for weights alone, plus headroom for the KV cache. If your GPU is smaller, plan to use a quantized model or pick a smaller checkpoint.
How to Install and Run vLLM
Getting a vLLM server up takes three steps: install the package, launch the server, and send a request. The following walkthrough uses a single GPU and a small open model so you can verify everything works before scaling up.
Step 1: Install vLLM
Install vLLM into a clean virtual environment to avoid CUDA dependency conflicts with other projects.
# Create an isolated environment (uv is fast; venv works too)
python -m venv .venv
source .venv/bin/activate

# Install vLLM (pulls in a matching PyTorch + CUDA build)
pip install vllm

# Verify the install and check the version
python -c "import vllm; print(vllm.__version__)"
The pip install vllm command pulls a prebuilt wheel with a bundled CUDA-enabled PyTorch, so you usually do not need to install PyTorch separately. However, if you hit a CUDA version mismatch, consult the vLLM install docs for the wheel that matches your driver.
Step 2: Launch the OpenAI-Compatible Server
vLLM ships a server entrypoint that exposes an OpenAI-style API. The command below downloads the model from Hugging Face on first run and serves it on port 8000.
# Serve an instruction-tuned 8B model on a single GPU
vllm serve meta-llama/Llama-3.1-8B-Instruct \
  --port 8000 \
  --max-model-len 8192 \
  --gpu-memory-utilization 0.90
Two flags here matter for production. First, --max-model-len caps the context window, which directly bounds how much KV cache memory each request can consume. Second, --gpu-memory-utilization tells vLLM what fraction of VRAM it may claim for weights and cache; 0.90 is aggressive but common on dedicated serving boxes.
When the server is ready, you will see a log line confirming it is listening. Gated models like Llama require a Hugging Face token, so export HF_TOKEN first if you hit a 401 during download.
Step 3: Send Your First Request
Because the server speaks the OpenAI protocol, you can call it with curl, the OpenAI SDK, or any compatible client. Here is a direct HTTP call.
curl http://localhost:8000/v1/chat/completions \
  -H "Content-Type: application/json" \
  -d '{
    "model": "meta-llama/Llama-3.1-8B-Instruct",
    "messages": [{"role": "user", "content": "Explain PagedAttention in two sentences."}],
    "max_tokens": 200
  }'
The model field must match the name you passed to vllm serve. Notably, the endpoint path (/v1/chat/completions) is identical to OpenAI’s, which is the whole point of the compatibility layer.
Calling vLLM From Python
Most applications will talk to vLLM through the official OpenAI SDK rather than raw HTTP. You only need to point the client at your server and pass any non-empty API key, since vLLM does not require a real one by default.
from openai import OpenAI

# Point the standard OpenAI client at the local vLLM server
client = OpenAI(
    base_url="http://localhost:8000/v1",
    api_key="not-needed",  # vLLM ignores this unless you enable auth
)

def summarize(text: str) -> str:
    response = client.chat.completions.create(
        model="meta-llama/Llama-3.1-8B-Instruct",
        messages=[
            {"role": "system", "content": "You summarize text concisely."},
            {"role": "user", "content": text},
        ],
        max_tokens=256,
        temperature=0.3,
    )
    return response.choices[0].message.content

if __name__ == "__main__":
    print(summarize("vLLM is an inference engine that ..."))
This pattern is powerful because it means you can develop against the real OpenAI API and switch to self-hosted vLLM in production by changing one environment variable. Therefore, teams often build their abstraction around the OpenAI client and treat the backend as swappable. If you route across several providers, a gateway like LiteLLM sits naturally in front of a vLLM endpoint.
Streaming Responses
For chat UIs, you want tokens to stream as they generate rather than waiting for the full response. vLLM supports server-sent streaming through the same SDK flag.
stream = client.chat.completions.create(
    model="meta-llama/Llama-3.1-8B-Instruct",
    messages=[{"role": "user", "content": "Write a haiku about GPUs."}],
    stream=True,
)

for chunk in stream:
    delta = chunk.choices[0].delta.content
    if delta:
        print(delta, end="", flush=True)
Streaming improves perceived latency dramatically, especially for long answers. For a deeper look at delivery patterns, see our guide on streaming AI chatbot responses.
Tuning vLLM for Throughput
Out of the box, vLLM is fast, but a few settings determine whether you serve 5 or 50 concurrent users per GPU. The right values depend on your model size, GPU, and traffic shape.
The most impactful knobs are the following:
--gpu-memory-utilization: Higher values leave more room for the KV cache, which raises the number of concurrent sequences. Push it toward 0.90–0.95 on dedicated GPUs.--max-model-len: Lower context limits free memory for batching. If your workload only needs 4K context, do not serve 128K.--max-num-seqs: Caps how many sequences run in a batch. Raise it for throughput, lower it to protect tail latency.--tensor-parallel-size: Splits one model across multiple GPUs when it does not fit on one. Use this for 70B-class models.--quantization: Loads quantized weights (AWQ, GPTQ, FP8) to fit bigger models in less VRAM.
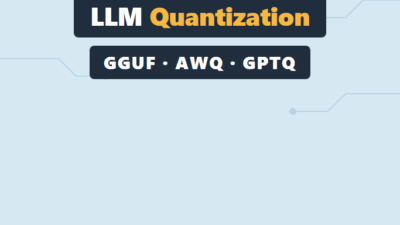
Quantization for Larger Models
When a model does not fit in FP16, quantization shrinks the weights to 8-bit or 4-bit with modest quality loss. vLLM supports several formats, and you typically point it at a pre-quantized checkpoint from Hugging Face.
# Serve a 4-bit AWQ checkpoint to fit a larger model on one GPU
vllm serve TheBloke/Mixtral-8x7B-Instruct-v0.1-AWQ \
  --quantization awq \
  --max-model-len 8192 \
  --gpu-memory-utilization 0.92
Quantization trades a small amount of accuracy for a large reduction in memory. Consequently, it lets a 24 GB GPU serve models that would otherwise need 48 GB or more. For lighter local experimentation without a serving layer, tools like Ollama or LM Studio are simpler, though they do not match vLLM’s throughput.
Multi-GPU With Tensor Parallelism
For a 70B model, weights alone exceed any single consumer GPU. Tensor parallelism splits each layer’s matrices across GPUs so the model runs as one logical server.
# Split a 70B model across 4 GPUs on one node
vllm serve meta-llama/Llama-3.1-70B-Instruct \
  --tensor-parallel-size 4 \
  --max-model-len 8192
Set --tensor-parallel-size to the number of GPUs on the node. Importantly, those GPUs should be connected with NVLink or a fast interconnect, because tensor parallelism is communication-heavy and a slow PCIe link becomes the bottleneck.
Real-World Scenario: Replacing a Hosted API to Cut Cost
Consider a mid-sized SaaS team running a document-classification feature on a hosted LLM API. As usage grew, the per-token bill climbed into uncomfortable territory, and the workload was predictable: short prompts, structured outputs, steady daytime traffic. This is a textbook case where self-hosting pays off.
The team moved the workload to a quantized 8B model on a single mid-tier cloud GPU served by vLLM. Because their app already used the OpenAI client, the migration was mostly a base-URL change plus prompt validation against the new model. Over a few weeks of tuning --max-num-seqs and --gpu-memory-utilization, they got throughput high enough that one GPU instance comfortably handled peak load.
The trade-off was real, though. They took on operational responsibility: GPU capacity planning, model updates, and on-call for a service that previously “just worked.” For high-volume, stable workloads, that overhead is worth it. For spiky or low-volume traffic, a hosted API usually wins on total cost of ownership once you price in engineering time.
When to Use vLLM
- You have steady, high-volume inference traffic where GPU cost dominates
- You need data to stay on your own infrastructure for privacy or compliance
- You want an OpenAI-compatible endpoint backed by open-weight models
- You need high concurrency and throughput from each GPU, not single-user inference
- You are standardizing a serving layer across several open models
When NOT to Use vLLM
- Your traffic is low or bursty, where a hosted API costs less than an idle GPU
- You only need single-user local inference (use Ollama or LM Studio instead)
- You lack GPU access or the ops capacity to run inference infrastructure
- You require a model or feature vLLM does not yet support
- Your latency target demands an ultra-low-latency hosted accelerator like Groq
Common Mistakes With vLLM
- Setting
--max-model-lenfar higher than you need, which starves the KV cache and tanks concurrency - Leaving
--gpu-memory-utilizationat a low default and wondering why throughput is poor - Running an FP16 model that barely fits, then getting out-of-memory crashes under real batch sizes
- Using tensor parallelism across GPUs with slow interconnects, which adds overhead instead of speed
- Forgetting to set
HF_TOKEN, then failing to download gated models like Llama - Treating a self-hosted endpoint as zero-maintenance and skipping monitoring and capacity planning
Deploying vLLM in Production
For production, run vLLM in a container so the CUDA environment is reproducible. The project publishes an official Docker image that bundles the server and dependencies.
# Run the official vLLM image, passing the GPU through to the container
docker run --runtime nvidia --gpus all \
  -p 8000:8000 \
  -e HF_TOKEN=$HF_TOKEN \
  vllm/vllm-openai:latest \
  --model meta-llama/Llama-3.1-8B-Instruct \
  --max-model-len 8192
The --gpus all flag requires the NVIDIA Container Toolkit on the host. From here, you can wrap the container in a Kubernetes Deployment with a readiness probe on /health, then put a load balancer in front. If you are new to containerized GPU workloads, our guide on deploying Python apps with Docker and Kubernetes covers the orchestration foundations.
Add basic guardrails before going live. Specifically, enable an API key with --api-key, set conservative request size limits, and export Prometheus metrics from the /metrics endpoint so you can alert on queue depth and latency. Refer to the official vLLM documentation for the current flag set, since the project moves quickly.
Conclusion
vLLM turns a single GPU into a high-throughput LLM endpoint by combining PagedAttention with continuous batching, and its OpenAI-compatible API makes adoption nearly free if you already use the OpenAI client. Use it when you have steady, high-volume traffic and the ops capacity to run inference yourself; reach for a hosted API or a local tool like Ollama when you do not. Start by serving a small quantized model on one GPU, tune --gpu-memory-utilization and --max-num-seqs against your real traffic, then scale out with tensor parallelism as your models grow. Next, explore fine-tuning vs RAG to decide how to adapt the open model you now serve with vLLM.
2 Comments