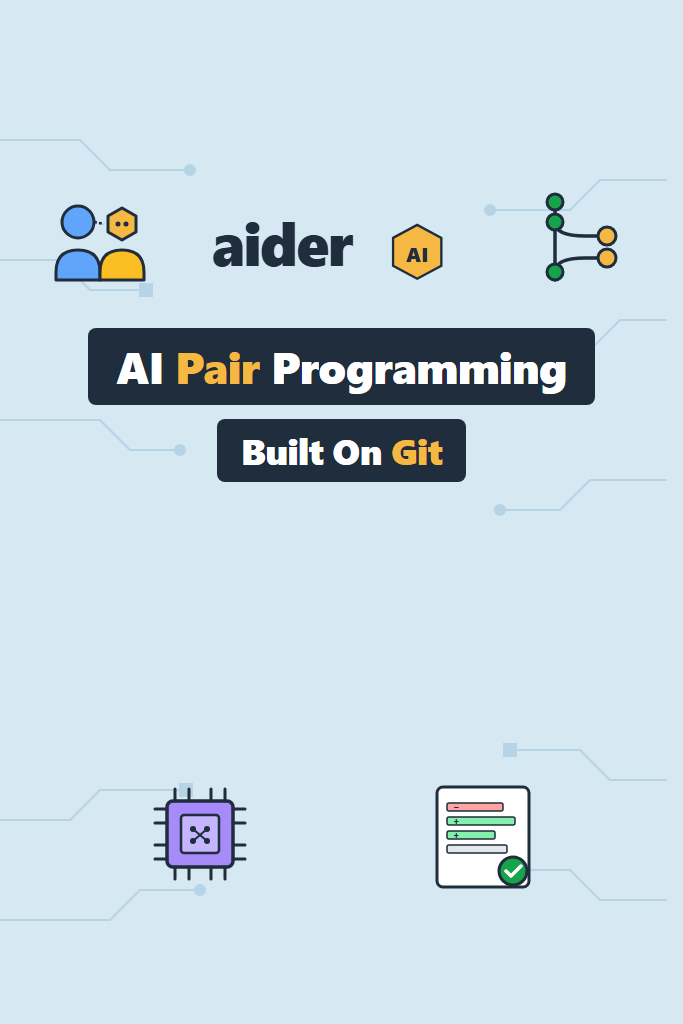
If your editor has turned into an AI chat window with a code panel attached, aider offers a different bargain: a terminal-first AI pair programming session that edits files in your repo, runs your tests, and commits the diff for you. It is open source, model-agnostic, and built around Git rather than around a proprietary editor. This guide walks through installing aider, picking a model, running your first session, and the patterns that hold up once you move past toy examples. The focus is on aider AI pair programming as a workflow, not a demo — by the end, you will know when to reach for it and when a fuller IDE agent is the better choice.
What Aider Actually Is
Aider is a command-line program written in Python that connects an LLM to a local Git repository. Instead of pasting code into a chat box, you launch aider in your project root, add the files you want it to touch, and describe what you want changed. Aider then sends the relevant context to a model, applies the returned edits to your files, runs any test or lint command you configured, and creates a Git commit with a message that summarizes the change.
In practice this means three things. First, every change is reviewable as a normal Git diff. Second, you can undo any edit with a single /undo command because everything is committed. Third, the conversation lives next to the code, not inside an editor extension, so the same workflow runs over SSH, inside tmux, or in a CI sandbox.
Aider is open source under the Apache 2.0 license. It supports OpenAI, Anthropic, Google, DeepSeek, Groq, OpenRouter, Azure, AWS Bedrock, and local models served through Ollama or any OpenAI-compatible endpoint. For background on the broader landscape, see our comparison of AI code assistants.
Why Pick a Terminal Tool Over an Editor Agent
Editor-native agents like Cursor and Windsurf put the chat surface inside the IDE. That is excellent for greenfield work and visual review. However, terminal tools win in three situations: remote development on a server you cannot easily install a heavy editor on, repos where you want the AI close to your existing test runner and Git workflow, and teams that want to script the agent into CI or dev-container automation. For a deeper editor-vs-terminal contrast in another stack, our Cursor vs Claude Code post lays out similar trade-offs.
Aider also pushes you toward small, reviewable diffs. Because each turn ends in a Git commit, sloppy multi-file rewrites become obvious before they pile up. That nudge alone is worth more than any individual feature.
Installing Aider in Five Minutes
Aider ships as a standard Python package. The recommended path is pipx, which isolates the install from your project virtualenvs.
# Recommended: install with pipx for an isolated CLI install
python -m pip install --user pipx
python -m pipx ensurepath
pipx install aider-chat

# Verify the install
aider --version
If you use uv, the install is a one-liner that produces an even faster startup:
uv tool install aider-chat
For a contained per-project setup, plain pip in a virtualenv works too:
python -m venv .venv
source .venv/bin/activate     # Windows: .venv\Scripts\activate
pip install aider-chat
After installing, set at least one provider API key in your environment. Aider reads the standard variable names, so a single export covers most setups:
# Pick the provider you actually use
export ANTHROPIC_API_KEY="sk-ant-..."
export OPENAI_API_KEY="sk-..."
export DEEPSEEK_API_KEY="sk-..."
For Windows PowerShell, use setx ANTHROPIC_API_KEY "sk-ant-..." and open a new shell.
Your First Aider Session
Aider expects to run inside a Git repository. If you point it at a folder that is not a repo, it will offer to initialize one — accept that, because Git is non-negotiable for the safety model. From your project root:
# Start an aider session with Claude Sonnet 4.5
aider --model anthropic/claude-sonnet-4-5

# Or start with GPT-4o
aider --model openai/gpt-4o

# Or with a local Ollama model
aider --model ollama_chat/llama3:70b
You will land in an aider prompt that looks like a chat REPL. The first thing to do is add files. Aider only edits files that are explicitly in the chat — this prevents it from rewriting half your repo by accident.
> /add src/auth/session.py tests/test_session.py

Added src/auth/session.py to the chat
Added tests/test_session.py to the chat

> Refactor get_session() to return a typed Session object instead of a dict,
  and update the test to match. Keep the public function signature stable.
Aider responds with a diff, applies it to the files, runs any configured test command, and creates a commit. If anything looks wrong, /undo reverts the last commit and you try again with a sharper prompt.
Adding the Right Files
A common early mistake is adding too many files. Aider charges tokens for everything in the chat, and a 5,000-line file you only needed to read costs the same as one you needed to edit. The rule that holds up: add files you want edited; let the repo map handle files you only want referenced.
If you only need the model to see a file without editing it, use /read:
> /read src/types/database.py
Read-only files are cheaper because aider can drop them from context if they are not relevant to the current turn.
Choosing a Model: Practical Recommendations
Aider works with most modern code-capable models, but the differences matter once you go beyond toy edits.
| Model | Strengths | Where it falls short |
|---|---|---|
| Claude Sonnet 4.5 | Strongest at multi-file refactors and architecture-aware edits | Higher cost per token than open-source alternatives |
| GPT-4o / GPT-4.1 | Reliable on idiomatic code in popular languages, good tool use | Sometimes over-edits surrounding lines |
| DeepSeek-V3 / Coder | Excellent quality for the price, strong on backend code | Slightly weaker on niche frameworks |
| Gemini 2.5 Pro | Big context window, good for large repo reasoning | Edit format compliance is hit or miss |
| Local (Llama 3.1 70B, Qwen 2.5 Coder) | Free, private, runs offline | Requires a beefy GPU; weaker on long edits |
For most paid users, Claude Sonnet 4.5 in architect mode plus a cheaper editor model hits the best price-to-quality point. For local-only setups, Qwen 2.5 Coder 32B in diff edit format is the current strong pick on a single 24GB GPU.
Architect Mode: Two Models, Better Edits
Architect mode splits the work between a planner model that thinks about the change and an editor model that applies it. The planner can be expensive and slow; the editor is cheap and fast. This setup often produces better diffs than running the planner model alone.
# Planner: Claude for reasoning. Editor: DeepSeek for cheap, fast diffs.
aider --architect \
  --model anthropic/claude-sonnet-4-5 \
  --editor-model deepseek/deepseek-coder
When to use architect mode: cross-file refactors, design-level changes, or anything where you want the model to think before it writes. Skip it for small one-file edits — the extra round trip is not worth the latency.
The Repo Map: How Aider Reads Large Codebases
Sending an entire repo to a model would be both expensive and useless past a certain size. Instead, aider builds a repository map — a compressed view of every Python, JavaScript, Go, Rust, and other supported file in the repo, listing classes, functions, and signatures. The model sees this map on every turn, so it can reference symbols you have not explicitly added to the chat.
The repo map is generated using tree-sitter parsers and ranked with a graph algorithm that highlights files most relevant to the current conversation. You rarely need to configure it, but two flags help on edge cases:
# Cap the map size (in tokens) for very large repos
aider --map-tokens 4096

# Disable the repo map if you want full control over context
aider --map-tokens 0
For a 50,000-line repo, leave the default. For a 500,000-line monorepo, raise the limit to 8,000 or 16,000 tokens and pair it with a planner model that has a generous context window.
Slash Commands You Will Actually Use
Aider has a long command list, but the same handful covers 90% of real sessions:
/add <path>— add files to the chat for editing/read <path>— add files as read-only context/drop <path>— remove files from the chat to free up tokens/diff— show the diff aider just applied/undo— revert the last aider commit/run <cmd>— run a shell command and add its output to the chat/test— run your configured test command and feed any failures back into the next turn/lint— run your configured lint command on changed files/commit— commit any out-of-band changes you made manually/tokens— show how much of your context window is in use/clear— clear the chat history but keep added files/web <url>— fetch a web page and add it as context (for docs, error pages, RFCs)/ask— ask a question without editing any files/code— force a code edit even after/askmode
/run and /test are the two that change how you work. Pasting a stack trace is fine; running the failing command directly so aider sees the exact output is faster and more accurate.
A Realistic Workflow: Fixing a Failing Test
Suppose you inherit a mid-sized FastAPI service, run the test suite, and one test fails with a KeyError deep in a session helper. A practical aider session looks like this:
$ aider --model anthropic/claude-sonnet-4-5

> /run pytest tests/test_session.py::test_resume_session -x
============================ FAILURES ============================
KeyError: 'user_id'
src/auth/session.py:84: KeyError

> /add src/auth/session.py tests/test_session.py
Added src/auth/session.py to the chat
Added tests/test_session.py to the chat

> The test fails with KeyError: 'user_id' on line 84 of session.py.
  Diagnose the root cause and fix it. Do not change the test.
[aider applies a 12-line diff, commits with message
“fix: handle missing user_id key in resume_session”]
> /test pytest tests/test_session.py 1 passed in 0.42s
That entire loop — reproduce, diagnose, fix, verify — happens without leaving the terminal. The commit is small, the diff is reviewable, and /undo rolls everything back if the fix is wrong.
For larger debugging walks, our guide on generating unit tests with LLMs covers complementary patterns for pushing test coverage up while you are already in an aider session.
Configuring Aider for a Project
For repeat use on the same project, a .aider.conf.yml file in the repo root removes flag-typing fatigue. A reasonable starting point:
# .aider.conf.yml
model: anthropic/claude-sonnet-4-5
editor-model: deepseek/deepseek-coder
architect: true

# Run linters and tests automatically after each edit
auto-commits: true
auto-lint: true
auto-test: true
lint-cmd: "ruff check --fix"
test-cmd: "pytest -x --tb=short"

# Cap the repo map for our 80k-LOC repo
map-tokens: 6000

# Keep secrets out of the chat
read-only:
  - .env.example
  - docs/architecture.md
With this in place, aider alone (no flags) launches the configured session. The auto-test setting is the real productivity unlock: when a test fails after an edit, aider feeds the failure back into the next turn and tries again, often fixing its own mistake without you typing anything.
A separate .aiderignore file works like .gitignore to keep generated files, vendored dependencies, and large data files out of the repo map. Include node_modules/, dist/, build artifacts, and any *.lock files.
Cost Control That Actually Matters
Token costs add up fast on large repos. Three habits keep bills predictable:
First, watch /tokens after a few turns. If the chat is over 30,000 tokens of files plus history, run /clear to reset the conversation while keeping the files. Long sessions accumulate context that no longer earns its keep.
Second, prefer /read over /add for files you only need as reference. Read-only files can be evicted by aider when they are not relevant; chat-added files stay in every turn.
Third, use prompt caching where the provider supports it. Anthropic’s API caches large file contents across turns — aider takes advantage of this automatically when you use Claude models, which can cut input costs by 50-80% on long sessions.
When to Use Aider
- You work primarily in a terminal or over SSH and want the AI close to your shell
- Your repo is mature enough that small, Git-reviewable diffs matter more than fast prototyping
- You want to script the AI into CI, dev containers, or one-shot batch jobs
- You are comparing models and want to swap providers without changing tools
- You need the workflow to run with a local model for privacy or air-gapped environments
When NOT to Use Aider
- You need a polished GUI for browsing code and visualizing changes — an editor agent is a better fit
- You are doing greenfield UI work where seeing the rendered result matters more than the diff
- Your team has standardized on a non-Git VCS — aider’s safety model assumes Git
- You want zero-config voice or screenshot input — those exist in aider but feel bolted on
- You need fine-grained sandboxing of every command execution — pair aider with a separate sandbox if so
Common Mistakes With Aider
- Adding too many files to the chat, which inflates token costs without improving edits
- Skipping the
auto-testconfig and missing the loop where aider fixes its own broken edits - Running aider outside a Git repo, which disables
/undoand turns small mistakes into manual cleanup - Ignoring the repo map size on large monorepos, which silently truncates relevant context
- Committing the
.aider.conf.ymlwith provider-specific model names without documenting why — switch costs go up later
Aider in a Real Codebase
In a mid-sized FastAPI backend with around 60 to 80 modules, a common adoption pattern is to use aider for two narrow tasks first: writing tests for legacy modules that lack coverage, and refactoring single files that have grown past 400 lines. Both tasks have small blast radius, clear success criteria (tests pass, file shrinks), and force the team to set up auto-test and a sane .aiderignore. After a few weeks of that, the same configuration extends naturally to bug fixes and small features. Teams that try to start with cross-cutting refactors often hit a frustrating loop of bad diffs and lose trust in the tool before they have tuned it. The smaller-scope path takes longer to feel impressive, but it is the one that survives.
For broader patterns on collaborating with AI assistants in production code, our piece on AI-powered pair programming best practices pairs well with this guide.
Conclusion: Where Aider Fits
Aider is the cleanest answer to the question, “What if my AI pair programmer lived in my terminal and respected Git?” It will not replace a polished editor agent for visual UI work, and it is not the right tool if you want a magic one-prompt-builds-the-app experience. However, for engineers who already think in diffs and commits, it is the most natural way to keep an LLM in the loop without changing how you work. Set up a .aider.conf.yml, pick a strong planner model, wire auto-test to your existing test command, and run it on real bugs for a week before judging it. The terminal-native workflow either clicks immediately or it does not — but aider AI pair programming rewards the engineers it fits with a tighter, more reviewable feedback loop than any chat window can match.
Next, take a look at our guide to using AI for code refactoring for prompts and patterns that translate directly into aider sessions.