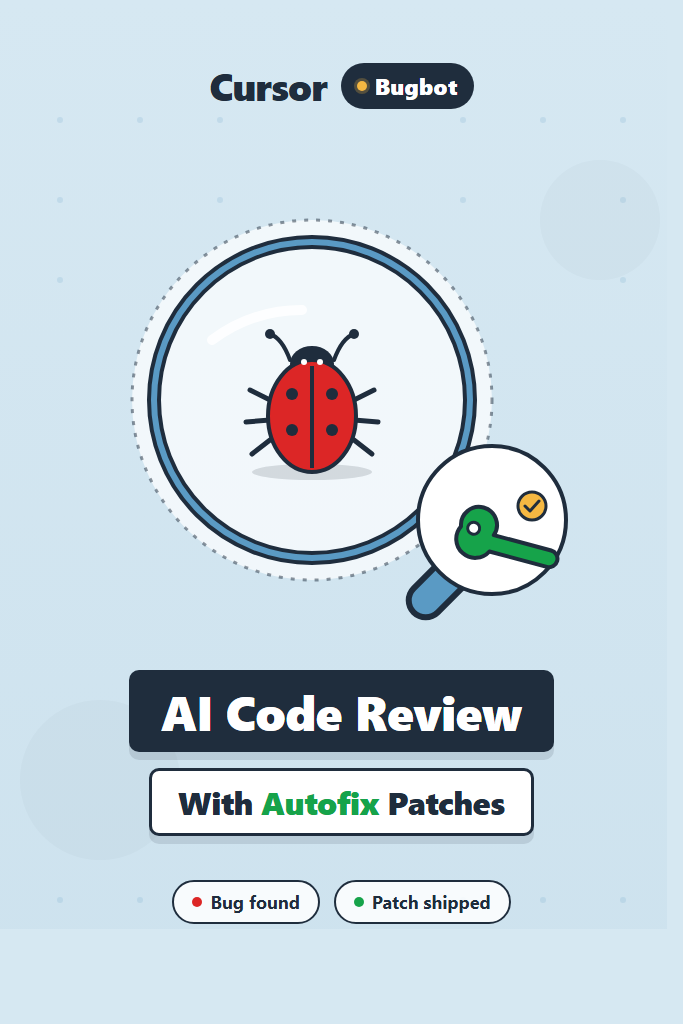
If your team merges pull requests faster than humans can review them, bugbot autofix is worth a serious look. Cursor’s Bugbot reads every PR, flags real defects, and now ships an autofix pass that opens a follow-up commit with the patch already written. This tutorial walks through installation, trigger modes, rule tuning, and the gotchas that bite teams who turn it on without thinking. By the end, you will know when Bugbot pays for itself, when it adds noise, and how to wire it into a workflow that human reviewers actually trust.
What Is Bugbot Autofix?
Bugbot autofix is a feature of Cursor’s Bugbot AI code reviewer that not only flags issues in a pull request but also drafts a patch and pushes it as a new commit on the same branch. Specifically, Bugbot uses Cursor’s background agent to read the full PR diff, run static analysis style checks, infer the intent of the change, and produce a minimal fix instead of a long comment.
In practice, the workflow looks like this. First, a developer opens a pull request on GitHub. Then Bugbot scans the diff and posts inline comments for any bug it identifies. Finally, the developer clicks a “Fix with Bugbot” button (or it triggers automatically based on settings), and Cursor’s background agent commits a patch to the branch.
This matters because most AI review tools stop at the comment. Consequently, a human still has to translate the suggestion into a working change, which kills the productivity argument for AI review in the first place. With autofix, the loop closes inside the PR.
The tradeoffs are real, though. Specifically, autofix can introduce subtle regressions when the model misreads intent, and the per-PR pricing model means cost scales with team activity. Therefore, you want to tune trigger modes and rules carefully before enabling it on every repo.
How Bugbot Autofix Works End-to-End
Understanding the pipeline helps you debug it later when something looks off. Here is what happens between “PR opened” and “fix committed.”
First, Bugbot subscribes to GitHub webhooks for pull request events. When a PR is opened, updated, or labeled (depending on your trigger mode), the webhook fires.
Next, Bugbot pulls the diff plus relevant surrounding context from your repo. Notably, it does not read the entire codebase on every run; instead, it loads files that the diff touches and a few related files that imports point to. This keeps cost predictable.
Then a model run (typically GPT or Claude class, configurable on Bugbot’s side) reviews the changes. Importantly, the prompt is structured to look for actual bugs — race conditions, off-by-one errors, missing null checks, broken error handling, and similar — not stylistic preferences. As a result, you get fewer “consider extracting this function” comments and more “this will throw on empty input” findings.
After identifying issues, Bugbot posts inline comments on the PR. Each comment includes a “Fix with Bugbot” button. When clicked (or auto-triggered), the request hands off to Cursor’s background agent.
Finally, the background agent applies the fix in an isolated environment, runs any specified test scripts, and pushes a new commit to the branch. Subsequently, GitHub re-runs CI on the patched code, and the developer reviews and merges.
The whole loop typically takes one to three minutes per fix, depending on repo size and CI duration.
Step 1: Install Bugbot in Your GitHub Repo
You need a Cursor account first. If your team already uses Cursor, log in at cursor.com and head to the dashboard. Otherwise, sign up and complete email verification before continuing.
Once logged in, navigate to the Bugbot section of your dashboard. There you will see a button to connect a GitHub account or organization. Click “Add to GitHub” and you will be redirected to GitHub’s app installation page.
On GitHub, choose either “All repositories” or “Only select repositories.” For most teams, start with one or two repos rather than enabling it everywhere — you want a feel for the false positive rate before letting it touch production code.
# Verify the install worked from a checked-out repo:
git remote -v
gh api /repos/:owner/:repo/installations --jq '.installations[].app_slug'

# Expected output should include:
# cursor-bugbot
After install, open a draft pull request in one of the connected repos. Within thirty seconds you should see a “Bugbot is reviewing” comment appear on the PR. If nothing happens after a couple of minutes, check the GitHub app permissions — Bugbot needs read access to pull requests, write access to comments, and write access to contents (for autofix to commit).
One nuance worth flagging: Bugbot’s GitHub app does not need admin scope on your repo. Therefore, if you are getting permission errors, check the installed app’s scopes rather than asking your org admin for elevated access.
Step 2: Configure Trigger Modes and Pricing
Bugbot has three trigger modes, and the wrong choice can either rack up cost or miss bugs entirely.
Automatic mode runs on every PR opened against the default branch. Consequently, this is the most expensive option but catches the most bugs. For small teams (fewer than five engineers), this is usually the right default.
Triggered mode runs only when someone comments @bugbot review on a PR. This is cheaper because you control when it runs, but easy to forget. Therefore, this mode works best for larger teams that already have humans triaging PRs and want Bugbot as a second opinion on flagged ones.
Selective mode runs only on PRs with a specific label (configurable, often needs-bugbot). In other words, this gives you the most control. As a result, teams that handle compliance-sensitive code often pick this mode so they can audit exactly which changes were AI-reviewed.
Pricing follows a per-PR model with a free tier that varies by plan. Specifically, the Pro plan includes a number of PR reviews per month, and overage bills at a per-review rate. Importantly, autofix invocations count separately from review runs, so a PR with three findings that you autofix will cost more than the same PR with three findings you fix manually.
To set the trigger mode, head back to the Bugbot dashboard, select your repo, and pick the mode under “Review triggers.” Save, and the change applies on the next PR.
# .cursor/bugbot.yml — optional config file checked into your repo
trigger: selective
trigger_label: needs-bugbot
autofix:
  enabled: true
  auto_apply: false
  test_command: "pnpm test"
ignore_paths:
  - "dist/**"
  - "**/*.generated.ts"
  - "vendor/**"
The auto_apply: false flag is important: it means Bugbot will draft fixes but require a human click before committing. In contrast, auto_apply: true will commit fixes immediately, which is fast but risks landing changes nobody read first.
Step 3: Tune Rules to Cut False Positives
The biggest complaint about AI code reviewers is noise. Specifically, comments that flag perfectly fine code, suggest changes that violate your house style, or repeat the same nit on every PR. Bugbot’s rule system addresses this directly.
You configure rules in .cursor/rules.md at the repo root. The file uses plain markdown and gets injected into Bugbot’s prompt for every review. Notably, this is the same rules file that Cursor IDE reads, so any preferences you have already set up carry over.
# .cursor/rules.md

## Project conventions
- We use Result<T, E> instead of throwing in service-layer code. Do not flag missing try/catch in service files.
- Public API handlers must validate input with Zod schemas. Flag missing validation as a bug.
- Database queries must use the prepared-statement helpers in `src/db/queries/`. Flag raw template-string SQL.

## What to focus on
- Race conditions in async code (especially around shared state)
- Off-by-one errors in pagination/slicing
- Missing null/undefined handling on external API responses
- Dropped errors in promise chains

## What to skip
- Stylistic preferences (formatting, variable naming) — Prettier handles these
- Documentation/comment suggestions
- Performance micro-optimizations unless they change algorithmic complexity
The rules file accomplishes two things at once. First, it teaches Bugbot your conventions so it stops flagging idiomatic code as broken. Second, it focuses attention on the bug categories that actually slip through your test suite.
For best results, iterate on this file every couple of weeks. Specifically, when Bugbot posts a comment that everyone ignores, ask why and add a rule. When it misses something a human reviewer caught, add a rule pointing at that pattern. Over a month or two, the false positive rate drops noticeably.
A common mistake here is being too vague. Instead of “follow our style guide,” write specific patterns Bugbot can match — file paths, function name prefixes, type names. The more concrete the rule, the better the model follows it.
Step 4: Trigger Autofix on Real Issues
With Bugbot installed and rules in place, you are ready to run autofix on a real PR. Open a branch with a known bug — for testing, deliberately introduce one — and push.
After Bugbot posts its review comments, click the “Fix with Bugbot” button on any comment. The button opens a side panel with a preview of what the agent plans to do.
// Before — Bugbot flagged this as a race condition
async function incrementCounter(userId: string) {
  const current = await db.counter.get(userId);
  await db.counter.set(userId, current + 1);
}

// After — Bugbot's autofix patch
async function incrementCounter(userId: string) {
  await db.counter.atomicIncrement(userId, 1);
}
Notice that the fix uses an atomic increment helper instead of slapping a lock around the read-modify-write pair. This is where rules pay off: Bugbot saw db.counter.atomicIncrement defined elsewhere in the repo and chose it over a heavier alternative. Without that context, an unrules-aware reviewer might have suggested a mutex.
Click “Apply fix” and Cursor’s background agent does three things in order. First, it spins up an isolated environment with a fresh checkout of your branch. Then it applies the patch and runs whatever test command you configured (typically npm test, pnpm test, or pytest). Finally, if tests pass, it pushes a commit; if tests fail, it reports the failure back as a PR comment and skips the commit.
This last step matters. Importantly, autofix does not silently land broken code. As a result, you can leave auto_apply: true enabled with reasonable confidence as long as your test suite is solid.
For larger fixes — anything touching more than a few files — the agent may take longer (sometimes up to five minutes). Meanwhile, the PR shows a “Bugbot is fixing…” status comment so reviewers know to wait.
Step 5: Combine Bugbot With Your Existing Reviewers
Bugbot is not a replacement for human review. Instead, treat it as the first pass that catches bugs before a senior engineer’s time gets spent on them.
In practice, the most effective workflow looks like this. The PR author opens a draft PR. Bugbot reviews it and posts comments. The author either applies fixes via autofix or addresses them manually, then marks the PR ready for review. Subsequently, a human reviewer focuses on architecture, naming, and whether the change is even the right approach — not “did you forget a null check.”
This division of labor compounds. Specifically, your senior engineers stop wasting time on the same five bug categories Bugbot catches reliably, and code review velocity goes up without sacrificing rigor.
For teams that want to formalize this, consider adding a required check to your branch protection rules. Specifically, require that Bugbot has reviewed the PR before merge is allowed. The check shows up in GitHub like any other CI gate.
# .github/branch-protection or via GitHub UI
required_status_checks:
  - "bugbot/review"
  - "ci/test"
  - "ci/lint"
If you also use Claude Code or another agentic dev tool, Bugbot pairs well with the existing Claude Code hooks setup for linting and tests — the hooks catch issues at commit time, Bugbot catches the rest at PR time.
Real-World Scenario: Catching a Race Condition Before Merge
Consider a mid-sized SaaS team running a Node.js backend with around 50 active developers and a shared payment processing service. The team had been running Bugbot in selective mode for two months, with autofix enabled but auto_apply set to false.
A backend engineer opened a PR adding idempotency keys to the payment endpoint. The diff looked clean — twenty lines of new code, a database column, and a check for existing keys before processing. Two human reviewers approved. CI passed.
Bugbot, however, posted a comment on the idempotency check:
“This read-then-write pattern can race when two requests with the same idempotency key arrive within milliseconds. Both reads return null, both writes succeed, and the payment processes twice. Consider using
INSERT ... ON CONFLICT DO NOTHINGand checking the row count instead.”
The autofix replaced the find-then-create pattern with a single insert that returned a boolean indicating whether the row was new. The team merged it after a quick second review. A week later, in production, traffic from a misbehaving mobile client briefly sent duplicate requests, and the new pattern correctly deduplicated them.
The point of this scenario is not that Bugbot is magic. Instead, it caught a class of bug — TOCTOU race conditions — that human reviewers reliably miss because the bug only manifests under timing patterns nobody simulates locally. Tools like this are not a replacement for testing or thinking; they are a cheap, fast pass over a category of mistakes that has a long history of slipping through.
When to Use Bugbot Autofix
- Your team merges enough PRs that human reviewers are bottlenecked
- You want a consistent first pass on bug categories like race conditions, null handling, and error swallowing
- Your test suite is solid enough to catch regressions if a fix breaks something
- You can afford the per-PR cost (do the math against engineering hours saved)
- Your repo follows conventions clear enough to encode in
.cursor/rules.md
When NOT to Use Bugbot Autofix
- Your codebase has minimal tests; autofix can introduce regressions you will not catch
- Compliance rules forbid AI-generated commits without explicit review (financial or healthcare codebases)
- Your team is small enough that human review handles bug catching adequately
- Most of your PRs are config or documentation changes — Bugbot will charge for runs that find nothing
- You have not yet set up rules; the false positive rate without them is rough
Common Mistakes with Bugbot Autofix
- Enabling
auto_apply: truewithout a strong test suite. Specifically, Bugbot’s fixes pass its own internal validation, but only your tests catch project-specific regressions. Therefore, leaveauto_apply: falseuntil you have at least decent coverage on the touched code paths. - Skipping the rules file. Without
.cursor/rules.md, Bugbot defaults to generic best practices, which often clash with your house style. As a result, the comment-to-noise ratio stays bad and the team stops trusting it. - Using automatic mode on every repo. Specifically, draft repos, prototypes, and infra repos rarely benefit from Bugbot review and run up cost. Therefore, start with selective mode on your two or three production repos and expand from there.
- Treating Bugbot comments as ground truth. In other words, Bugbot is wrong sometimes. Therefore, when a comment looks off, dig in rather than blindly accepting the autofix. The button is fast; that does not mean every press is correct.
- Forgetting to tune
ignore_paths. Without this, Bugbot will review generated code, vendor directories, and build artifacts. Consequently, you waste both review runs and cost on files nobody is going to read. - Not running autofix patches through CI. If your branch protection skips Bugbot’s commits, regressions can land. Therefore, make sure CI runs on every push to the branch, including autofix-generated commits.
Conclusion
Bugbot autofix is one of the first AI code review tools that closes the loop end-to-end — from “we found a bug” to “here is the patch, tested” without leaving the pull request. For teams with healthy test coverage and a willingness to tune rules, it can pay for itself within a few weeks by freeing senior engineer time from routine bug hunting. The tradeoff is real cost and the need to stay vigilant about false positives, but the per-PR economics work for most growing teams.
Start with one repo, selective mode, and auto_apply: false. After a couple of weeks, look at which comments your team kept and which they ignored, and tune the rules file accordingly. From there, decide whether to expand to more repos or switch to automatic triggering.
Next, take a look at the broader landscape of AI-powered code review tools to compare alternatives, then read up on code review best practices so the human reviewers picking up the second pass are sharp. If you want a deeper view of how Bugbot fits with the rest of the Cursor toolchain, our guide to Cursor IDE setup for full-stack development covers the editor side, and Cursor rules and .cursorrules explains how to share context across the IDE and Bugbot. For an alternative philosophy, our Cursor vs Claude Code comparison lays out where each tool fits.