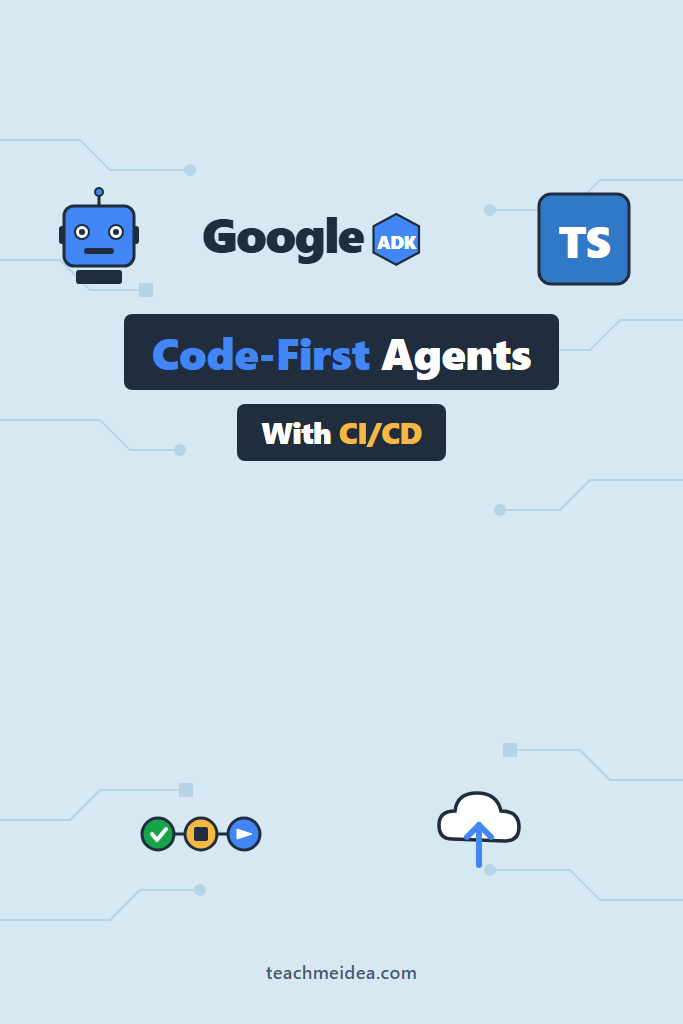
If you have been wiring up TypeScript agents with bespoke prompt files, ad-hoc tool schemas, and a YAML deploy script, Google ADK for TypeScript offers a more disciplined alternative. ADK (Agent Development Kit) is Google’s open-source framework for building, evaluating, and shipping LLM agents — with TypeScript joining Python and Java as a first-class SDK. This tutorial walks through building a real agent, wiring up evals, and pushing it through GitHub Actions to Vertex AI Agent Engine.
This guide targets intermediate TypeScript developers who have shipped at least one LLM feature in production. You should be comfortable with Node.js, async/await, and basic Google Cloud concepts. By the end, you will have a working multi-tool agent, a local dev loop, an eval harness, and a CI/CD pipeline that deploys on every merge to main.
What Is Google ADK?
Google ADK is a code-first framework for defining LLM agents, their tools, and their evaluation criteria as TypeScript code rather than declarative YAML or no-code flows. It ships with first-class support for Gemini models, structured outputs, multi-agent orchestration, and one-command deployment to Vertex AI Agent Engine or Cloud Run. The framework treats agents the way modern infrastructure treats services: versioned, testable, and CI/CD-friendly.
The “code-first” framing matters because most agent platforms force a choice between visual builders (fast to prototype, painful to test) and raw SDK calls (flexible but no structure for evals or deployment). ADK splits the difference: you write idiomatic TypeScript, but the framework gives you opinionated primitives for tools, state, and routing.
Why TypeScript Developers Should Care
Most early agent frameworks were Python-first. TypeScript teams either reinvented orchestration logic against the OpenAI or Anthropic SDKs, or wrapped Python services behind HTTP boundaries. ADK changes that calculus because the TypeScript SDK targets feature parity with Python — same agent primitives, same eval framework, same deployment targets.
In addition, ADK plays well with the rest of the TypeScript AI ecosystem. You can mix ADK agents with Vercel AI SDK streaming chat on the frontend, or call out to other TypeScript agent frameworks like Mastra or VoltAgent when their primitives fit better.
Prerequisites
Before you start, set up the following:
- Node.js 20+ and pnpm or npm
- A Google Cloud project with billing enabled
- The
gcloudCLI installed and authenticated - Vertex AI API enabled in your project
- A GitHub repository for CI/CD
Run the auth bootstrap once:
gcloud auth application-default login
gcloud config set project YOUR_PROJECT_ID
gcloud services enable aiplatform.googleapis.com
The application-default credentials give the ADK runtime access to Vertex AI without hardcoding service account keys. For production, you will swap these for workload identity inside the deployment runtime.
Step 1: Initialize the Project
Create a new project and install ADK:
mkdir support-triage-agent && cd support-triage-agent
npm init -y
npm install @google/adk @google-cloud/aiplatform zod
npm install -D typescript tsx @types/node vitest
npx tsc --init --target es2022 --module nodenext --moduleResolution nodenext
ADK ships with TypeScript types out of the box. The zod dependency is not strictly required, but ADK’s tool definitions integrate with Zod schemas for runtime validation — this is the same pattern you would use with Pydantic for type-safe Python agents.
Create the project structure:
mkdir -p src/agents src/tools src/evals
touch src/agents/triage.ts src/tools/tickets.ts src/evals/triage.eval.ts
This feature-first folder layout keeps each agent’s code, tools, and evals colocated — the same principle behind feature-based Flutter project structure, applied to agents.
Step 2: Define Your First Agent
Agents in ADK are plain TypeScript objects with a model, instructions, and a list of tools. Here is a support ticket triage agent that classifies incoming tickets and routes them to the right team:
// src/agents/triage.ts
import { Agent } from '@google/adk';
import { lookupCustomer, searchKnowledgeBase, escalateToHuman } from '../tools/tickets';

export const triageAgent = new Agent({
  name: 'support_triage',
  model: 'gemini-2.5-pro',
  description: 'Classifies support tickets and routes them to the correct team.',
  instructions: `
    You are a support triage agent. For each incoming ticket:
    1. Look up the customer's account using lookup_customer.
    2. Search the knowledge base for similar past tickets.
    3. If the issue is documented and low-severity, suggest a solution.
    4. Otherwise, escalate to a human with a clear summary.
    Always cite the knowledge base article ID when suggesting a solution.
  `,
  tools: [lookupCustomer, searchKnowledgeBase, escalateToHuman],
});
The instructions field becomes the system prompt at runtime. Importantly, ADK does not silently inject extra instructions — what you write is what the model sees, which makes prompt debugging predictable. Furthermore, the model field accepts any Gemini variant, and you can swap to a smaller model like gemini-2.5-flash for cost-sensitive paths.
Step 3: Define Tools With Zod Schemas
Tools in ADK are typed functions with Zod input schemas. The framework converts your Zod schema into the JSON schema that Gemini’s function-calling API expects, so you never write raw JSON schemas by hand:
// src/tools/tickets.ts
import { tool } from '@google/adk';
import { z } from 'zod';

export const lookupCustomer = tool({
  name: 'lookup_customer',
  description: 'Fetch a customer account by email.',
  schema: z.object({
    email: z.string().email().describe('Customer email address'),
  }),
  execute: async ({ email }) => {
    const response = await fetch(`${process.env.CRM_API}/customers?email=${email}`, {
      headers: { Authorization: `Bearer ${process.env.CRM_TOKEN}` },
    });
    if (!response.ok) {
      throw new Error(`CRM lookup failed: ${response.status}`);
    }
    return await response.json();
  },
});

export const searchKnowledgeBase = tool({
  name: 'search_knowledge_base',
  description: 'Search internal KB articles by natural language query.',
  schema: z.object({
    query: z.string().min(3).describe('Search query'),
    limit: z.number().int().min(1).max(10).default(5),
  }),
  execute: async ({ query, limit }) => {
    const response = await fetch(`${process.env.KB_API}/search`, {
      method: 'POST',
      headers: { 'Content-Type': 'application/json' },
      body: JSON.stringify({ query, limit }),
    });
    return await response.json();
  },
});

export const escalateToHuman = tool({
  name: 'escalate_to_human',
  description: 'Create a high-priority ticket for human review.',
  schema: z.object({
    summary: z.string().min(10).describe('Concise summary of the issue'),
    severity: z.enum(['low', 'medium', 'high', 'critical']),
    customerId: z.string(),
  }),
  execute: async ({ summary, severity, customerId }) => {
    const response = await fetch(`${process.env.TICKET_API}/escalate`, {
      method: 'POST',
      headers: { 'Content-Type': 'application/json' },
      body: JSON.stringify({ summary, severity, customerId, source: 'triage_agent' }),
    });
    return await response.json();
  },
});
Each tool’s description and the .describe() calls on individual fields land directly in the model’s function schema. As a result, the more precise these descriptions are, the fewer hallucinated tool calls you will see in practice.
Step 4: Run the Agent Locally
ADK provides a runner that handles the conversation loop, tool invocations, and state management:
// src/index.ts
import { Runner } from '@google/adk';
import { triageAgent } from './agents/triage';

async function main() {
  const runner = new Runner({ agent: triageAgent });

  const response = await runner.run({
    input: 'My API key stopped working this morning. Email: jane@acme.io',
    sessionId: 'session-' + Date.now(),
  });

  console.log('Response:', response.output);
  console.log('Tool calls:', response.toolCalls.length);
  console.log('Tokens used:', response.usage.totalTokens);
}

main().catch(console.error);
Run it:
npx tsx src/index.ts
The runner exposes the full execution trace — every tool call, the arguments, the response, and the final output. For long-running agents, swap run for stream to get incremental output. Streaming is particularly useful for SSE-based chat UIs where users expect token-by-token responses.
Step 5: Add Multi-Agent Routing
Single-purpose agents are simpler, but real systems often need specialized sub-agents. ADK supports this via agentTools — agents you can invoke from other agents:
// src/agents/billing.ts
import { Agent } from '@google/adk';
import { lookupInvoice, processRefund } from '../tools/billing';

export const billingAgent = new Agent({
  name: 'billing_specialist',
  model: 'gemini-2.5-flash',
  description: 'Handles billing questions, invoice lookups, and refund requests.',
  instructions: 'You are a billing specialist. Use the provided tools to resolve billing issues.',
  tools: [lookupInvoice, processRefund],
});
Then update the triage agent to delegate:
// src/agents/triage.ts (updated)
import { Agent, asAgentTool } from '@google/adk';
import { billingAgent } from './billing';
import { lookupCustomer, searchKnowledgeBase, escalateToHuman } from '../tools/tickets';

export const triageAgent = new Agent({
  name: 'support_triage',
  model: 'gemini-2.5-pro',
  instructions: `
    Triage incoming tickets. For billing issues, delegate to the billing_specialist.
    For technical issues, search the KB or escalate.
  `,
  tools: [
    lookupCustomer,
    searchKnowledgeBase,
    escalateToHuman,
    asAgentTool(billingAgent),
  ],
});
The asAgentTool wrapper turns any agent into a callable tool with its own context window. Consequently, the billing agent sees only the messages it needs, which keeps token usage and latency under control. This is a similar pattern to what CrewAI uses for multi-agent teams, but with stricter typing.
Step 6: Write Evals (Not Tests)
Unit tests verify deterministic behavior. Evals measure how often a non-deterministic agent does the right thing across realistic inputs. ADK’s eval framework lets you define test cases, expected outcomes, and grading rubrics:
// src/evals/triage.eval.ts
import { evalSet } from '@google/adk';
import { triageAgent } from '../agents/triage';

export default evalSet({
  agent: triageAgent,
  cases: [
    {
      name: 'billing_question_routes_correctly',
      input: 'I was charged twice for my October invoice. Email: bob@acme.io',
      assertions: [
        { type: 'tool_called', name: 'lookup_customer' },
        { type: 'agent_invoked', name: 'billing_specialist' },
      ],
    },
    {
      name: 'kb_match_avoids_escalation',
      input: 'How do I reset my API key? Email: alice@acme.io',
      assertions: [
        { type: 'tool_called', name: 'search_knowledge_base' },
        { type: 'tool_not_called', name: 'escalate_to_human' },
        { type: 'response_contains', value: 'KB-' },
      ],
    },
    {
      name: 'critical_issue_escalates',
      input: 'Our entire production cluster is down because of your API. Email: cto@bigco.com',
      assertions: [
        { type: 'tool_called', name: 'escalate_to_human', args: { severity: 'critical' } },
      ],
    },
  ],
});
Run the eval suite:
npx adk eval src/evals/triage.eval.ts --threshold=0.85
The threshold sets the minimum pass rate. Notably, ADK runs each case multiple times by default (configurable via --samples) to account for model nondeterminism. The output gives you per-case pass rates, tool-call accuracy, and aggregate scores — exactly what you need to gate a CI deployment.
Step 7: Wire Up CI/CD With GitHub Actions
Now connect the dots. Create a GitHub Actions workflow that runs evals on every PR and deploys to Vertex AI Agent Engine on merge to main:
# .github/workflows/deploy.yml
name: Deploy Agent

on:
  push:
    branches: [main]
  pull_request:
    branches: [main]

jobs:
  test-and-deploy:
    runs-on: ubuntu-latest
    permissions:
      id-token: write
      contents: read

    steps:
      - uses: actions/checkout@v4

      - uses: actions/setup-node@v4
        with:
          node-version: 20
          cache: npm

      - run: npm ci

      - uses: google-github-actions/auth@v2
        with:
          workload_identity_provider: ${{ secrets.GCP_WIF_PROVIDER }}
          service_account: ${{ secrets.GCP_SERVICE_ACCOUNT }}

      - name: Run unit tests
        run: npm test

      - name: Run agent evals
        run: npx adk eval src/evals/ --threshold=0.85
        env:
          CRM_API: ${{ secrets.CRM_API }}
          CRM_TOKEN: ${{ secrets.CRM_TOKEN }}

      - name: Deploy to Vertex AI Agent Engine
        if: github.ref == 'refs/heads/main'
        run: |
          npx adk deploy \
            --agent src/agents/triage.ts \
            --project ${{ secrets.GCP_PROJECT }} \
            --region us-central1 \
            --runtime vertex-agent-engine
The workload identity federation block replaces long-lived service account keys with short-lived OIDC tokens issued by GitHub. This is the same security posture you want for any Node.js CI/CD pipeline with GitHub Actions — never commit credentials, never use static keys when federation works.
When the deploy step runs, ADK packages the agent (TypeScript bundle plus tool dependencies), uploads it to Vertex AI, and registers a new version. Furthermore, traffic only shifts to the new version after a health check passes, so you get safe rollouts by default.
Step 8: Observability in Production
ADK auto-emits OpenTelemetry traces for every agent run, every tool call, and every model response. Connect them to Cloud Trace or any OTLP-compatible backend:
// src/telemetry.ts
import { setupTelemetry } from '@google/adk/telemetry';

setupTelemetry({
  exporter: 'otlp',
  endpoint: process.env.OTEL_ENDPOINT,
  attributes: {
    'service.name': 'support-triage-agent',
    'service.version': process.env.GIT_SHA,
  },
});
Import this once at the entry point and every agent invocation generates a trace span tree. You will see model latency, tool latency, token counts, and any errors — the kind of LLM observability you would otherwise wire up by hand, built in.
When to Use Google ADK for TypeScript
- You already run on Google Cloud and want first-class Gemini integration
- Your team prefers TypeScript over Python for backend AI services
- You need a structured eval workflow tied to CI/CD, not ad-hoc prompt testing
- You are building multi-agent systems with clear delegation boundaries
- You want managed deployment via Vertex AI Agent Engine without writing custom infrastructure
When NOT to Use Google ADK for TypeScript
- You are committed to OpenAI or Anthropic models and have no plans to add Gemini
- You need a visual no-code builder for non-engineers to edit prompts
- Your agents are simple enough that a 50-line wrapper around the Anthropic SDK works fine
- You run on AWS or Azure and do not want a Google Cloud dependency
- Your eval needs are met by DSPy’s programmatic prompt optimization or another framework with stronger optimization primitives
Common Mistakes With Google ADK for TypeScript
- Skipping evals because “the agent works in dev” — model drift catches you on the next Gemini version bump
- Putting business logic in instructions instead of tools — instructions should describe behavior, tools should perform actions
- Using a single mega-agent for everything instead of splitting into specialized sub-agents with
asAgentTool - Hardcoding model names across many agents — define a config module so model bumps happen in one place
- Forgetting to set timeouts on tool
executefunctions — a hanging HTTP call freezes the entire agent run - Treating CI/CD as optional — without automated deploys, prompt changes drift between dev and prod within weeks
A Real Migration Scenario
Consider a mid-sized SaaS company with a Python LangChain agent handling support triage. The team is a small backend group, mostly TypeScript, and they have been maintaining the Python service reluctantly. Once an ADK TypeScript SDK is on the table, this kind of team will typically migrate over several weeks.
The migration surfaced three insights worth noting. First, the tool definitions ported almost directly — Zod schemas mapped cleanly from Pydantic, and the actual HTTP calls were already TypeScript in adjacent services. Second, eval coverage actually improved during the migration because ADK’s evalSet format forced explicit assertions where the LangChain version had used loose string matching. Third, deploy time dropped from several minutes (custom Cloud Run container with Python runtime) to roughly one minute (native Vertex AI Agent Engine deployment) — which compounds when you ship multiple times a day.
The trade-off was that some niche LangChain integrations (a specific vector store wrapper) had no direct ADK equivalent and had to be reimplemented as a custom tool. For most teams, that cost is one-time and small relative to the long-term maintenance win.
Conclusion
Google ADK for TypeScript brings the discipline of modern backend engineering — code-first definitions, typed schemas, eval suites, and CI/CD — to LLM agent development. The framework is opinionated enough to give your team structure, but flexible enough that you are not locked into a single workflow. As a result, you spend less time gluing SDKs together and more time on the actual agent behavior.
Start by porting one small agent over, wiring up three to five eval cases, and pushing it through a simple GitHub Actions workflow. Once the loop feels solid, expand to multi-agent routing. Next, explore building AI agents with tools, planning, and execution for deeper architectural patterns that apply across frameworks.