If you have built a single LLM agent and hit a wall when the task needed planning, code execution, and review in one loop, Microsoft AutoGen is the framework worth knowing next. It treats agents as first-class citizens that talk to each other, hand off work, and run tools — all in pure Python. This tutorial walks through AutoGen v0.4 (the redesigned, async-native release) from a clean install to a working multi-agent team that writes, executes, and reviews code.
This guide is written for intermediate Python developers who have used the OpenAI or Claude API at least once and want a production-shaped multi-agent setup. By the end, you will have a runnable group chat, a tool-using assistant, and a clear sense of when AutoGen is the right pick versus alternatives like CrewAI or LangGraph.
What Is Microsoft AutoGen?
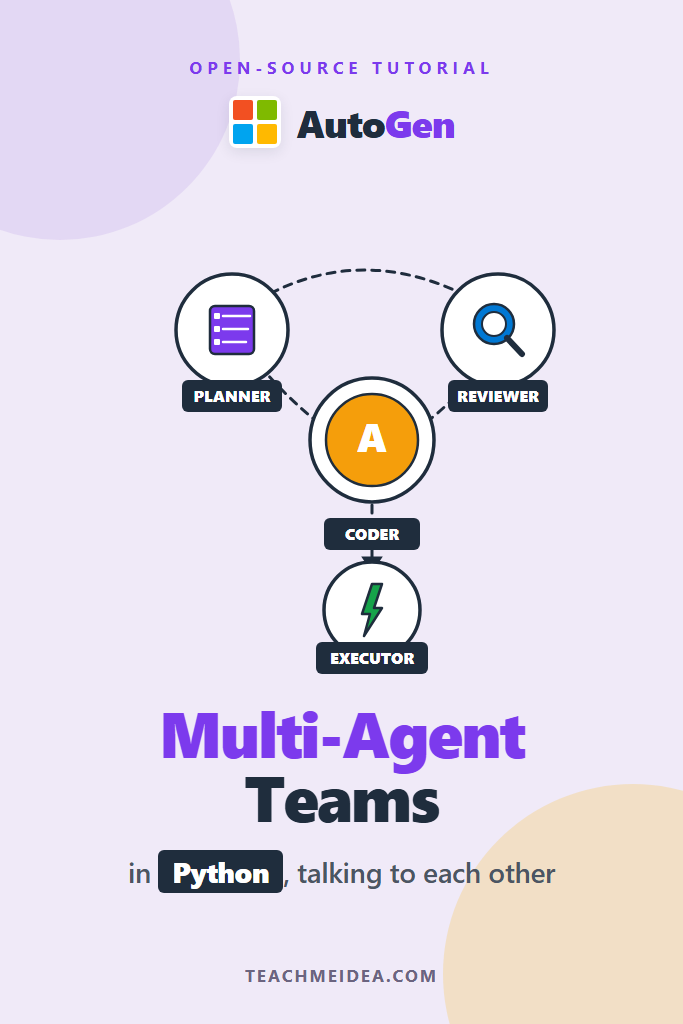
Microsoft AutoGen is an open-source Python framework for building multi-agent LLM applications. It models work as conversations between specialized agents — for example, a planner that decomposes the task, a coder that writes solutions, and a critic that reviews output before delivery. Originally released by Microsoft Research in 2023, AutoGen was rewritten from the ground up in 2024 into the v0.4 architecture, which is asynchronous, event-driven, and designed for production rather than notebook demos.
The framework ships in three layers. The Core layer handles message passing between agents and supports distributed deployment. The AgentChat layer provides high-level abstractions like AssistantAgent, UserProxyAgent, and RoundRobinGroupChat — this is where most tutorials live. The Extensions layer adds optional integrations: OpenAI, Azure OpenAI, Anthropic, Docker code executors, web tools, and so on.
If you have used LangChain fundamentals before, think of AutoGen as the opposite philosophy. LangChain composes chains of components; AutoGen composes conversations between agents. The mental model is closer to a software team passing tickets than a data pipeline.
Why Multi-Agent Instead of One Big Prompt?
Before diving into code, it helps to know when this approach actually pays off. A single agent with a large system prompt can handle a surprising range of tasks. However, splitting roles starts to win once you need several distinct behaviors in one loop — generating, testing, and critiquing code, for instance.
Multi-agent setups give you three concrete benefits. First, role-specific prompts stay shorter and more focused, which improves output quality and reduces token cost. Second, you can mix models — a cheap model for routing, a stronger one for code generation. Third, the conversation history becomes a natural audit trail when something goes wrong in production.
If you only have one role and one tool, you do not need a framework. Stick with the raw API. For deeper background on agentic patterns in general, see our guide on building AI agents with tools, planning, and execution.
Installing AutoGen v0.4
AutoGen v0.4 is split across multiple PyPI packages. For most tutorials you need three of them:
python -m venv .venv
source .venv/bin/activate  # Windows: .venv\Scripts\activate

pip install "autogen-agentchat" "autogen-ext[openai]" "autogen-core"
The first package gives you the high-level agent classes. The second pulls in the OpenAI client (swap for autogen-ext[anthropic] if you prefer Claude). The third is the message-passing core.
Set your API key once per shell. Both OPENAI_API_KEY and ANTHROPIC_API_KEY are picked up automatically:
export OPENAI_API_KEY="sk-..."
Verify the install with a quick import check:
import asyncio
from autogen_agentchat.agents import AssistantAgent
from autogen_ext.models.openai import OpenAIChatCompletionClient

print("AutoGen ready")
If that runs without errors, you are good to move on.
Your First AutoGen Agent
Let us start with the smallest useful program: a single assistant agent that answers a question. This is essentially the OpenAI SDK with a thin wrapper, but it sets up the patterns you will reuse for everything else.
import asyncio
from autogen_agentchat.agents import AssistantAgent
from autogen_agentchat.messages import TextMessage
from autogen_core import CancellationToken
from autogen_ext.models.openai import OpenAIChatCompletionClient

async def main():
    model_client = OpenAIChatCompletionClient(model="gpt-4o-mini")

    assistant = AssistantAgent(
        name="researcher",
        model_client=model_client,
        system_message=(
            "You are a concise research assistant. "
            "Answer in under 100 words. Cite sources where possible."
        ),
    )

    response = await assistant.on_messages(
        [TextMessage(content="Explain RAG in one paragraph.", source="user")],
        cancellation_token=CancellationToken(),
    )

    print(response.chat_message.content)
    await model_client.close()

asyncio.run(main())
A few things to notice. The entire framework is async — there is no synchronous mode in v0.4. The system_message is the role definition; this is where prompt engineering happens. The cancellation_token lets you interrupt long-running calls, which matters once you have agents that loop. Finally, always close the model client to flush HTTP connections.
Adding Tools to an Agent
A pure chat agent is rarely useful in production. Real agents need tools — functions they can call to look things up, run code, or hit your own APIs. AutoGen treats any Python function with type hints as a tool.
Here is an assistant that can check weather and calculate currency conversion:
import asyncio
from autogen_agentchat.agents import AssistantAgent
from autogen_agentchat.ui import Console
from autogen_ext.models.openai import OpenAIChatCompletionClient

async def get_weather(city: str) -> str:
    """Return current weather for a city. Production: call a real API."""
    fake_data = {"London": "12C cloudy", "Tokyo": "18C clear"}
    return fake_data.get(city, "Unknown city")

async def convert_currency(amount: float, from_curr: str, to_curr: str) -> str:
    """Convert between currencies. Production: hit an FX rate API."""
    rates = {("USD", "EUR"): 0.92, ("EUR", "USD"): 1.09}
    rate = rates.get((from_curr, to_curr), 1.0)
    return f"{amount} {from_curr} = {amount * rate:.2f} {to_curr}"

async def main():
    model_client = OpenAIChatCompletionClient(model="gpt-4o")

    travel_agent = AssistantAgent(
        name="travel_assistant",
        model_client=model_client,
        tools=[get_weather, convert_currency],
        system_message=(
            "You help travelers. Use the available tools when relevant. "
            "Reply with 'TERMINATE' when the user's question is fully answered."
        ),
        reflect_on_tool_use=True,
    )

    await Console(
        travel_agent.run_stream(
            task="What is the weather in Tokyo, and how much is 100 USD in EUR?"
        )
    )
    await model_client.close()

asyncio.run(main())
The agent decides on its own which tools to call and in what order. The reflect_on_tool_use=True flag tells the agent to summarize results into a natural-language answer after tool calls finish — without it, you get raw tool outputs back. The Console helper prints the conversation as it streams, which is invaluable when debugging.
One detail worth highlighting: AutoGen reads each tool’s docstring and type annotations to build the JSON schema sent to the LLM. Vague docstrings produce vague tool selection. Treat them as part of your prompt. If you have worked with Claude’s tool use directly, the schema-from-docstring approach should feel familiar.
Multi-Agent Conversations: The Group Chat Pattern
This is where AutoGen earns its name. Instead of one agent juggling roles, you create several specialists and let them talk. The simplest pattern is RoundRobinGroupChat: agents take turns speaking until a termination condition is met.
A classic example is a writer-critic loop. The writer drafts, the critic reviews, and the loop continues until the critic approves:
import asyncio
from autogen_agentchat.agents import AssistantAgent
from autogen_agentchat.teams import RoundRobinGroupChat
from autogen_agentchat.conditions import TextMentionTermination, MaxMessageTermination
from autogen_agentchat.ui import Console
from autogen_ext.models.openai import OpenAIChatCompletionClient

async def main():
    model_client = OpenAIChatCompletionClient(model="gpt-4o-mini")

    writer = AssistantAgent(
        name="writer",
        model_client=model_client,
        system_message=(
            "You are a technical writer. Draft short blog intros (under 80 words). "
            "Revise based on the critic's feedback."
        ),
    )

    critic = AssistantAgent(
        name="critic",
        model_client=model_client,
        system_message=(
            "You are an editor. Review the writer's draft for clarity and tone. "
            "If the draft is solid, reply with 'APPROVED'. "
            "Otherwise, give one specific improvement and ask for a revision."
        ),
    )

    # Stop when critic says APPROVED, or after 6 messages as a safety cap
    termination = TextMentionTermination("APPROVED") | MaxMessageTermination(6)

    team = RoundRobinGroupChat(
        participants=[writer, critic],
        termination_condition=termination,
    )

    await Console(team.run_stream(
        task="Draft an intro for a blog post about database connection pooling."
    ))
    await model_client.close()

asyncio.run(main())
The combined termination condition is critical. TextMentionTermination waits for a specific phrase; MaxMessageTermination is the circuit breaker that prevents infinite loops if the critic never approves. Production code should always include both — never trust a single termination signal.
If you have used CrewAI before, this is roughly equivalent to a sequential task with two agents. The difference is that AutoGen’s group chat is genuinely conversational — agents see the full message history, not just the previous agent’s output. That can be either a feature or a token-cost problem depending on your prompt design.
For a deeper comparison of how multi-agent orchestration differs across frameworks, see our walkthroughs of CrewAI multi-agent teams and LangGraph stateful cyclic agents.
Selector Group Chat: Letting the LLM Pick the Next Speaker
Round-robin is simple but rigid. In many real workflows, the next speaker depends on what was just said — a plan came back, so the coder should speak next; the coder finished, so the tester should run. AutoGen’s SelectorGroupChat uses an LLM call to decide which agent goes next based on the conversation so far.
import asyncio
from autogen_agentchat.agents import AssistantAgent
from autogen_agentchat.teams import SelectorGroupChat
from autogen_agentchat.conditions import TextMentionTermination, MaxMessageTermination
from autogen_agentchat.ui import Console
from autogen_ext.models.openai import OpenAIChatCompletionClient

async def main():
    model_client = OpenAIChatCompletionClient(model="gpt-4o-mini")

    planner = AssistantAgent(
        name="planner",
        model_client=model_client,
        description="Breaks down the task into ordered steps.",
        system_message="You plan tasks as numbered steps. Pass to the coder when ready.",
    )

    coder = AssistantAgent(
        name="coder",
        model_client=model_client,
        description="Writes Python code based on the plan.",
        system_message="You write clean Python. Once code is ready, ask the reviewer.",
    )

    reviewer = AssistantAgent(
        name="reviewer",
        model_client=model_client,
        description="Reviews code for bugs and style.",
        system_message=(
            "Review the coder's output. If it's correct, reply with 'DONE'. "
            "Otherwise, request changes."
        ),
    )

    termination = TextMentionTermination("DONE") | MaxMessageTermination(10)

    team = SelectorGroupChat(
        participants=[planner, coder, reviewer],
        model_client=model_client,
        termination_condition=termination,
        allow_repeated_speaker=False,
    )

    await Console(team.run_stream(
        task="Write a Python function that returns the nth Fibonacci number using memoization."
    ))
    await model_client.close()

asyncio.run(main())
The description field on each agent is what the selector reads when deciding who speaks next, so write it as if you were briefing a router LLM. Setting allow_repeated_speaker=False prevents the same agent from monologuing for several turns, which is a common cause of token bloat.
In practice, SelectorGroupChat adds one extra LLM call per turn (the selection step). For workflows under 10 turns, the overhead is negligible. For long-running agents, consider using a smaller model for the selector — it does not need to be GPT-4o-class.
Adding Code Execution
The most production-relevant AutoGen feature is its sandboxed code executor. You can give an agent the ability to actually run the Python it writes, capture stdout, and react to errors. This turns the writer-critic-reviewer loop above into a real software loop.
The recommended setup uses Docker for isolation:
import asyncio
from autogen_agentchat.agents import AssistantAgent, CodeExecutorAgent
from autogen_agentchat.teams import RoundRobinGroupChat
from autogen_agentchat.conditions import TextMentionTermination
from autogen_agentchat.ui import Console
from autogen_ext.code_executors.docker import DockerCommandLineCodeExecutor
from autogen_ext.models.openai import OpenAIChatCompletionClient

async def main():
    model_client = OpenAIChatCompletionClient(model="gpt-4o")

    async with DockerCommandLineCodeExecutor(work_dir="./coding") as executor:
        coder = AssistantAgent(
            name="coder",
            model_client=model_client,
            system_message=(
                "You solve coding tasks. Write Python in ```python``` blocks. "
                "After execution succeeds, reply with 'DONE'."
            ),
        )

        runner = CodeExecutorAgent(name="runner", code_executor=executor)

        team = RoundRobinGroupChat(
            participants=[coder, runner],
            termination_condition=TextMentionTermination("DONE"),
        )

        await Console(team.run_stream(
            task="Calculate the prime factors of 600851475143 and print them."
        ))

    await model_client.close()

asyncio.run(main())
The flow: the coder writes a code block, the runner executes it in a Docker container and returns stdout (or the error), the coder iterates if needed. Never run agent-generated code on the host — even for trusted models, an unexpected os.system("rm -rf /") is one hallucination away. The DockerCommandLineCodeExecutor provides the isolation you want for free.
If Docker is not available, LocalCommandLineCodeExecutor exists, but treat it as development-only. For more on safe agent execution, the principles in our building AI agents guide apply directly.
A Real-World Scenario: Customer Support Triage
Consider a mid-sized SaaS team that handles 200-400 support tickets per day. Most tickets are repetitive — password resets, billing questions, basic feature confusion. A single-prompt classifier misses nuance and routinely escalates simple cases to humans.
A practical AutoGen setup splits the work across three agents. A triage agent reads the ticket and tags it (billing, technical, account). A resolution agent drafts a response using a knowledge-base tool that retrieves the top three relevant docs. A quality agent checks the response against tone and policy rules before it leaves.
Teams that deploy this pattern usually report two outcomes. Auto-resolution rates climb meaningfully — often the framework handles 40-60% of tickets without human review for simple categories. However, the cost-per-ticket also climbs because every ticket now triggers multiple LLM calls. The break-even depends on labor cost; teams in low-cost regions sometimes find that a single well-prompted agent is more economical, while teams in high-cost regions see clear savings.
The lesson is that multi-agent quality improvements have to be measured against the multi-agent token bill. AutoGen makes it easy to log every message — use that telemetry to track which roles actually move the needle versus which ones are decorative.
AutoGen Studio: The No-Code Companion
For prototyping and demos, Microsoft ships AutoGen Studio — a web UI on top of the same Python core. Install and run it with:
pip install -U "autogenstudio"
autogenstudio ui --port 8081
Then visit http://localhost:8081. You can drag-and-drop agents, configure model clients, and run team chats with a visual conversation viewer. The team configurations export to JSON, which loads back into Python code via from_config. For internal stakeholder demos, this is a faster way to show value than ten lines of print output. For production, write the Python directly — the UI tends to lag the framework releases by a few weeks.
When to Use Microsoft AutoGen
- You need multiple specialized agents (planner, coder, reviewer) collaborating on one task
- Your workflow benefits from agents executing real code in a sandboxed environment
- You want async, event-driven message passing built in from day one
- You plan to mix models (cheap router, strong coder, fast critic) in one pipeline
- You need distributed agent deployment across services (Core layer supports this)
When NOT to Use Microsoft AutoGen
- Your task is a single-agent question-answer flow — use the raw OpenAI or Anthropic SDK
- You need stateful graph control with explicit edges and cycles — LangGraph fits better
- Your team is more comfortable with declarative role/task definitions — CrewAI has a gentler learning curve
- You are building a chain of deterministic steps with one LLM call per step — LangChain Expression Language is lighter
- Token cost is your primary constraint — every additional agent multiplies your bill
Common Mistakes with Microsoft AutoGen
- Skipping the max-message termination cap. A bad termination phrase plus an LLM that never says it equals a runaway agent loop. Always combine
TextMentionTerminationwithMaxMessageTermination. - Vague agent descriptions in SelectorGroupChat. The selector picks the next speaker by reading
descriptionstrings — generic ones produce random routing. Write descriptions like job postings, not throwaway labels. - Running agent-generated code without Docker.
LocalCommandLineCodeExecutorwill happily execute whatever the LLM writes. Use the Docker executor for anything beyond local experiments. - Treating v0.2 docs as current. The 2023 v0.2 API was synchronous and structured very differently. Any blog post written before late 2024 likely references that version. Always check that examples import from
autogen_agentchat, not the oldautogen. - Letting every agent see the full history. By default, group chats share complete message history. For long-running chats, this blows up your token bill. Use
model_contextto truncate or summarize older messages.
AutoGen vs CrewAI vs LangGraph: Quick Decision
| Framework | Best at | Mental model | Production-ready |
|---|---|---|---|
| AutoGen | Conversational multi-agent with code execution | Software team chatting | Yes (v0.4) |
| CrewAI | Declarative role/task pipelines | Project manager assigning tasks | Yes |
| LangGraph | Stateful graphs with explicit control flow | Workflow engine with LLM nodes | Yes |
If your problem looks like a team meeting, AutoGen. If it looks like a kanban board, CrewAI. If it looks like a state machine, LangGraph. Most teams end up trying two of them before settling — that experimentation is normal and worth the time.
Observability and Logging
AutoGen integrates with OpenTelemetry out of the box. For local debugging, the simplest setup is to log every message to stdout:
import logging
from autogen_agentchat import EVENT_LOGGER_NAME

logging.basicConfig(level=logging.INFO)
logging.getLogger(EVENT_LOGGER_NAME).setLevel(logging.INFO)
For production, point the OTel exporter at LangSmith, Langfuse, or your existing observability stack. The events you care about are LLMCallEvent (token cost), ToolCallEvent (which tools fire and how often), and ResponseEvent (final outputs per turn). Without this telemetry, debugging a misbehaving multi-agent team is essentially guesswork.
Conclusion: Next Steps with Microsoft AutoGen
Microsoft AutoGen is the right pick when your problem genuinely benefits from multiple specialized agents conversing with each other — code generation with review loops, research with critic gates, support triage with quality checks. It is overkill for single-agent tasks and underkill for rigidly structured workflows. Start with the writer-critic pattern, add tools when you need real-world data, and bring in code execution only once you have the conversation flow working end-to-end.
For your next steps, build the writer-critic example above and replace the topic with a real task from your project. Once that runs end-to-end, swap one agent’s model from gpt-4o-mini to gpt-4o and compare quality — you will quickly learn where stronger models earn their cost. Finally, compare the same problem against CrewAI’s multi-agent teams and LangGraph’s stateful agents before committing to a stack.