If you like the terminal-first feel of Claude Code but want something open-source, model-agnostic, and forkable, OpenCode is the closest match available today. This OpenCode setup guide walks you through installation, provider authentication, configuration, agents, and the first real workflow — so you end up with a working terminal coding agent that runs against whatever LLM you prefer, including local models. By the end, you will know when OpenCode beats Claude Code, when it does not, and which mistakes trip up most newcomers.
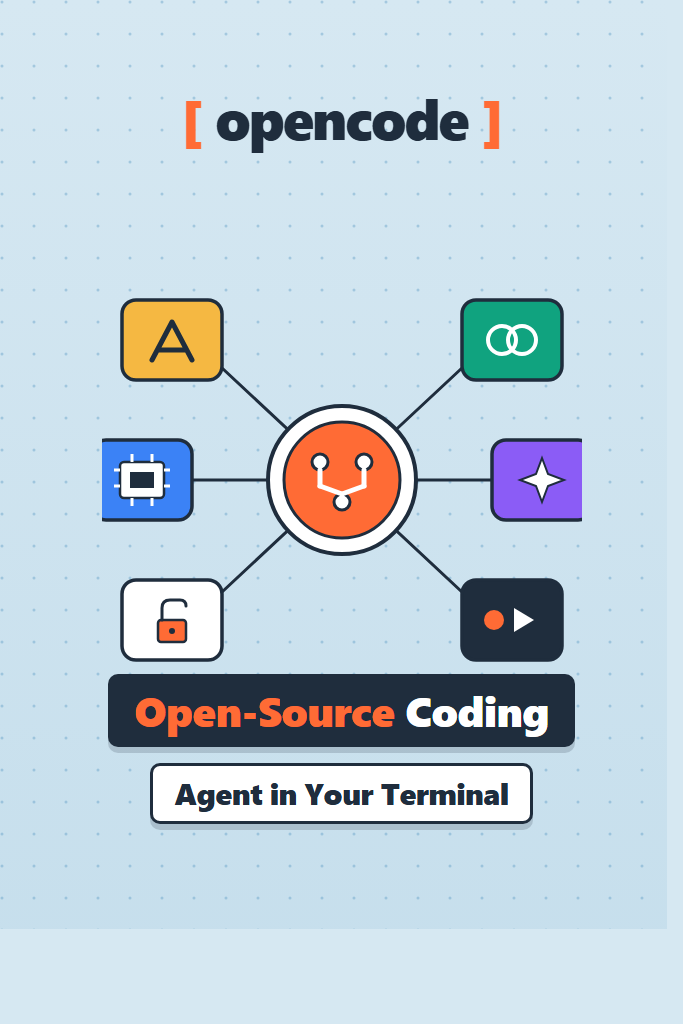
What Is OpenCode?
OpenCode is an open-source, terminal-based AI coding agent that runs in your project directory and edits files, runs commands, and reasons about your codebase through any supported LLM provider. It ships as a single binary (or npm package), uses a TUI similar to Claude Code, and is licensed permissively so teams can audit, fork, or self-host it. The project is provider-agnostic by design, which is the core reason most developers switch to it.
Crucially, OpenCode is not a Claude Code clone. The defaults are different, the configuration model is different, and the agent system has its own conventions. However, the core mental model — drop into a folder, talk to the model, watch it edit files and run commands — is the same.
OpenCode vs Claude Code: Key Differences
| Feature | OpenCode | Claude Code |
|---|---|---|
| License | Open-source (MIT) | Proprietary |
| LLM providers | Any (Anthropic, OpenAI, Google, local, custom) | Anthropic models only |
| Local model support | Yes (Ollama, LM Studio, vLLM) | No |
| Configuration | opencode.json (project + global) | settings.json + CLAUDE.md |
| Agent system | Custom subagents, plan/build modes | Subagents, hooks, skills |
| MCP servers | Supported | Supported |
| Self-hosting | Yes | Not applicable |
| Maturity | Younger ecosystem | More plugins, more docs |
The takeaway: pick OpenCode when provider lock-in or open-source matter. Pick Claude Code when you want the most polished workflow with the strongest Anthropic models. For a fuller side-by-side of the closed-source options, see our Cursor vs Claude Code comparison.
Prerequisites Before You Start the OpenCode Setup
You need a few things in place before installing:
- A Unix-like shell (macOS, Linux, or WSL on Windows). Native Windows works but is less tested
- Node.js 18+ if you plan to install via npm (optional otherwise)
- An API key from at least one LLM provider, or a local model running on Ollama or LM Studio
- A real project to test against — OpenCode is far more useful in a non-empty repo
You do not need to uninstall Claude Code, Cursor, or any other agent. OpenCode lives in its own binary and reads its own config files, so the tools coexist cleanly.
Step 1: Install OpenCode
There are two common installation paths. Pick whichever fits your environment.
Install via the Shell Script
For macOS, Linux, and WSL, the maintained install script is the simplest route:
curl -fsSL https://opencode.ai/install | bash
This downloads the right binary for your platform, places it in ~/.opencode/bin, and prints the path entry you need to add to your shell. After running it, restart your shell (or source your rc file) and verify:
opencode --version
Expected output is a single version string. If you get command not found, the install path was not added to $PATH — re-read the script’s output and add the line it suggested to ~/.zshrc or ~/.bashrc.
Install via npm
If you already manage CLI tools with Node, this is cleaner:
npm install -g opencode-ai
The npm package wraps the same binary. Verify with opencode --version exactly as above. The npm route makes it easy to pin a specific version per machine, which matters when you want reproducible behavior across a team.
Step 2: Authenticate a Provider
OpenCode supports a long list of providers, but most setups start with one of three: Anthropic, OpenAI, or a local model. Run:
opencode auth login
This launches an interactive picker. Select a provider, paste the API key when prompted, and OpenCode stores it in ~/.local/share/opencode/auth.json (the exact path varies by OS). For the providers that support OAuth — including Anthropic Pro/Max accounts — the same command opens a browser flow instead of asking for a key, so you do not need to manage long-lived API tokens locally.
For a local model, you skip this step entirely. Instead, you point OpenCode at your Ollama or LM Studio endpoint in the config file (covered in Step 4). To run local models smoothly, our Ollama walkthrough is a good companion read for the surrounding API patterns.
You can authenticate multiple providers at once. OpenCode picks the active one based on configuration, so it is fine to pre-load Anthropic, OpenAI, and a local endpoint and switch between them per project.
Step 3: Run Your First Session
Change into a real project directory and launch the TUI:
cd ~/code/your-project
opencode
The agent indexes your repo on first launch (a few seconds for small repos, longer for large ones), then drops you into a chat-style prompt. The first message you send sets the tone for the session, so make it specific. For example:
Read src/auth/middleware.ts and tell me what the request validation
flow looks like. Do not make changes yet.
OpenCode reads the file, summarizes the flow, and waits. This is the default “build” mode — the agent can read, edit, and run commands within your permissions. To stay in read-only territory while you explore, switch to plan mode (most builds bind it to a key like Tab or Ctrl+P; the on-screen footer always shows the current binding).
A common newcomer mistake at this step: dumping a giant vague task (“refactor auth to be cleaner”) into the first message. The agent will try, but the result is rarely what you wanted. Treat the first session like onboarding a junior dev — give it one well-scoped task, watch what it does, then expand the scope.
Step 4: Configure OpenCode With opencode.json
OpenCode reads configuration from two places, in order of precedence:
opencode.jsonin your project root (or.opencode/opencode.json)~/.config/opencode/opencode.json(global defaults)
Project config wins, which is the right default — different repos often need different models, MCP servers, or permission levels. Here is a realistic project-level config:
{
  "$schema": "https://opencode.ai/config.json",
  "model": "anthropic/claude-sonnet-4-5",
  "small_model": "anthropic/claude-haiku-4-5",
  "autoshare": false,
  "autoupdate": true,
  "permissions": {
    "edit": "allow",
    "bash": {
      "git push *": "ask",
      "rm -rf *": "deny",
      "*": "allow"
    }
  },
  "instructions": ["./.opencode/conventions.md"]
}
Why this works:
modelandsmall_modellet the agent route cheap operations (like file summarization) to a faster model and reasoning-heavy work to a stronger oneautoshare: falsekeeps sessions private — important for client repos- The
permissionsblock lets the agent run most shell commands automatically, asks before destructivegit push, and refusesrm -rfoutright instructionspoints to a project-specific markdown file (the OpenCode equivalent ofCLAUDE.md) where you document conventions the agent should follow
The schema URL gives you full IDE autocomplete in VS Code and similar editors, which removes most config-related typos.
Pointing at a Local Model
For a local-first setup, swap the providers section. With Ollama running on the default port:
{
  "$schema": "https://opencode.ai/config.json",
  "provider": {
    "ollama": {
      "npm": "@ai-sdk/openai-compatible",
      "name": "Ollama (local)",
      "options": {
        "baseURL": "http://localhost:11434/v1"
      },
      "models": {
        "qwen2.5-coder:32b": { "name": "Qwen2.5 Coder 32B" }
      }
    }
  },
  "model": "ollama/qwen2.5-coder:32b"
}
This is one of OpenCode’s biggest selling points: the same TUI, the same agent loop, but running entirely on your hardware. Latency is higher than cloud Claude, but for sensitive code or offline work it is genuinely usable on a recent Mac or a 24GB+ GPU.
Step 5: Define Custom Agents
Agents are scoped sub-personalities the main agent can call into. They isolate context, enforce a narrower system prompt, and often run on a different model. OpenCode looks for them under .opencode/agent/<name>.md (project) or ~/.config/opencode/agent/<name>.md (global).
A practical example — a code reviewer agent that never touches files:
---
description: Review code changes for correctness, security, and clarity. Read-only.
mode: subagent
model: anthropic/claude-sonnet-4-5
tools:
  read: true
  grep: true
  glob: true
  edit: false
  write: false
  bash: false
---

You are a senior code reviewer. Given a diff or a file, identify:
- Correctness issues (bugs, edge cases, race conditions)
- Security concerns (injection, secrets, auth bypass)
- Clarity problems (naming, dead code, misleading comments)

Do not propose rewrites. List findings as a numbered list with file:line
references. Be specific — never "consider improving error handling".
The frontmatter is the contract: tools enforces read-only behavior even if the agent tries to edit, and mode: subagent means the main agent invokes it instead of the user. From the main session, you trigger it with something like:
@review src/auth/middleware.ts
The reviewer runs in its own context window, returns findings, and the main agent decides what to do with them. This pattern keeps long-running sessions from drifting — the reviewer never has to read the unrelated chatter from the rest of your conversation.
For a deeper look at the same idea applied to the closed-source side, our Claude Code subagents guide covers the parallel-execution patterns that translate directly to OpenCode.
Step 6: Add MCP Servers
OpenCode supports the Model Context Protocol, which means any MCP server you have already wired up to Claude Code, Cursor, or another client will work here too. Add servers under the mcp key:
{
  "$schema": "https://opencode.ai/config.json",
  "mcp": {
    "filesystem": {
      "type": "local",
      "command": ["npx", "-y", "@modelcontextprotocol/server-filesystem", "/Users/me/notes"]
    },
    "linear": {
      "type": "remote",
      "url": "https://mcp.linear.app/sse",
      "enabled": true
    }
  }
}
Local MCP servers run as child processes; remote ones speak over SSE or HTTP. Once registered, their tools appear inside the agent’s available toolset and the model can call them like any other tool. If you have not used MCP before, our Claude Code MCP servers walkthrough covers the protocol fundamentals — they apply identically to OpenCode.
Step 7: Slash Commands and Custom Workflows
For tasks you run constantly — generating commit messages, running the test suite with output piped to the agent, opening a structured PR — slash commands save real time. Drop a markdown file at .opencode/command/commit.md:
---
description: Stage all changes and write a Conventional Commits message.
---

Run `git status` and `git diff --cached`. Stage any unstaged changes that
look intentional. Then write a Conventional Commits message that explains
the *why* in 1–2 sentences. Run the commit. Do not push.
Inside a session you invoke it with /commit, the agent reads the command file, treats it as the new task, and executes. This is the OpenCode equivalent of Claude Code slash commands — the file format is slightly different, but the mental model is the same. Our Claude Code slash commands guide is a useful reference if you want patterns to port over.
A Real-World Workflow: Adding a Feature End-to-End
Here is what a typical mid-sized task looks like once your OpenCode setup is dialed in. Imagine a Node.js API where you need to add rate limiting on a single route. A solo developer working in a focused 90-minute block might run something like this:
- Switch to plan mode and ask: “Map the request lifecycle for
POST /api/uploads. List every file touched, in order.” OpenCode reads the codebase, returns a numbered list, and stays read-only - Confirm the plan, switch to build mode: “Add token-bucket rate limiting at 10 req/min per user on
POST /api/uploads. Use the existing Redis client. Add a unit test.” - Watch the agent edit
src/middleware/rate-limit.ts, register the middleware in the route file, and write a test under__tests__/ - Run
/review(the custom agent from Step 5) against the diff. Fix the two findings it returns - Use
/committo stage and write a Conventional Commits message. Push manually because the permissions config requires confirmation
The whole loop fits in one terminal window, runs against whichever model is configured for the project, and never touches a web browser. That is the productivity argument for OpenCode in a nutshell — the same loop you would do manually, with one engineer’s worth of mechanical work absorbed by the agent. For comparison, the equivalent loop in Cursor or VS Code with Copilot is more click-heavy and more dependent on specific provider lock-in.
When to Use OpenCode
- You want a terminal coding agent but cannot use closed-source tools (regulated industry, security policy, personal preference)
- Your team uses multiple LLM providers — Anthropic for some work, OpenAI or Gemini for others, local models for sensitive code
- You need to self-host or audit the agent code for compliance reasons
- You already like Claude Code’s TUI and want a similar experience without provider lock-in
- You run local models often and want a single agent that works across cloud and local backends
When NOT to Use OpenCode
- You only ever use Anthropic models and want the deepest, most polished integration — Claude Code is more mature for that path
- You prefer an in-editor experience with diff hunks and inline accept/reject — try Cursor or Windsurf instead
- You are coding on Windows without WSL and want zero friction — terminal agents in general work better on Unix-like shells
- Your repo is large and you need an agent with a deeply tuned codebase index — pure terminal agents (including OpenCode and Aider) work, but graphical tools sometimes index faster
- You need official enterprise support, an SLA, or vendor-managed compliance certifications
Common Mistakes With OpenCode
A handful of pitfalls show up over and over in early adoption:
- Skipping the project config. Running OpenCode with only the global default model means every repo gets the same provider, the same permissions, and the same instructions. Project-level
opencode.jsonis where the real value lives — invest 10 minutes in it per repo - Granting blanket bash permissions. Setting
"bash": "allow"works until the agent runs a destructive command at 2 AM. Keeprm -rf *, force-pushes, and database drops onaskordeny. The permissions config is the single most important safety net you have - Stuffing instructions into the global config. Project-specific conventions (file structure, test patterns, naming) belong in
.opencode/conventions.md, not in your global setup. Otherwise, the agent starts applying React conventions to your Python service - Not using plan mode for risky changes. Build mode is great for small, well-scoped edits. For migrations, refactors, or anything spanning more than a couple of files, switch to plan mode first, review the plan, then execute. The five-second pause is worth it
- Treating subagents as decoration. A reviewer subagent that never gets called is just markdown. Wire
@reviewinto your standard flow — for example, run it before every/commit— so the isolation actually pays off - Mixing local and cloud models without intent. Running a 7B local model for hard reasoning and Claude Sonnet for trivial summarization is the wrong way around. Use
modelfor reasoning-heavy work,small_modelfor cheap operations, and pick based on the task
OpenCode Setup: Final Recommendation
For most developers who want a production-grade open-source terminal agent, the answer is straightforward: install OpenCode via the shell script or npm, authenticate one cloud provider (Anthropic or OpenAI), drop a project-level opencode.json with sensible permissions, and add one or two custom agents you actually use. That is roughly 30 minutes of setup and it pays back inside a week. As you grow into it, layer in MCP servers, local model support, and slash commands.
OpenCode is not strictly better than Claude Code — it is a different tradeoff. Open-source and provider-agnostic come with a smaller ecosystem and slightly rougher edges. However, for teams that care about audit, control, or multi-provider flexibility, that tradeoff is the right one.
If you want to compare your options before committing, our AI tools coding productivity roundup covers the broader landscape, and the Aider terminal pair-programming guide is the closest other open-source agent worth knowing about.
2 Comments